 Neat And Organized – Dave’s Totes
Please refer to all manufacturers’ label instructions for proper product usage.
After recording my first video, I received emails and phone calls accusing me of being “neat and organized.” This misconception evidently comes from the background of my video – my tool shelf.
Allow me to set the record straight. The only time my studio is anything close to being clean, is when I “neaten it up” prior to taping a video or taking a photograph. Otherwise (and I’m not proud of it) – it looks like a bomb went off in there.
I’ve read articles from Master Carvers advising that tools should be set down with the tips facing away, not touching each other, and that we should clean up our wood chips. While I know this is excellent advice, it’s about as easy for me to follow as exercising daily while limiting my intake of ice cream and Snickers. I have good intentions, but heck, you know which way the road of good intentions is paved.
So, when Dave Myers from Onalaska, Wisconsin, pulled up a chair next to me in Tom Gow’s Bark Carving Class at the International Woodcarvers Congress last June, and started unloading his carving supplies, I was totally awed and astonished! Now, there is a carver who is NEAT AND ORGANIZED in capital letters.

On the second day of the five-day class, I told Dave that woodcarvers would love to see his equipment totes and know how he made them. Dave was kind enough to take photos, email me terrific instructions, and allow me to share them with all of you. Carvers are the best people!
Looking at his totes, I thought that Dave had cut grooves into the plywood for the dividers. After reading his instructions, I now know that he glued in the dividers — very smart and quite a lot easier.
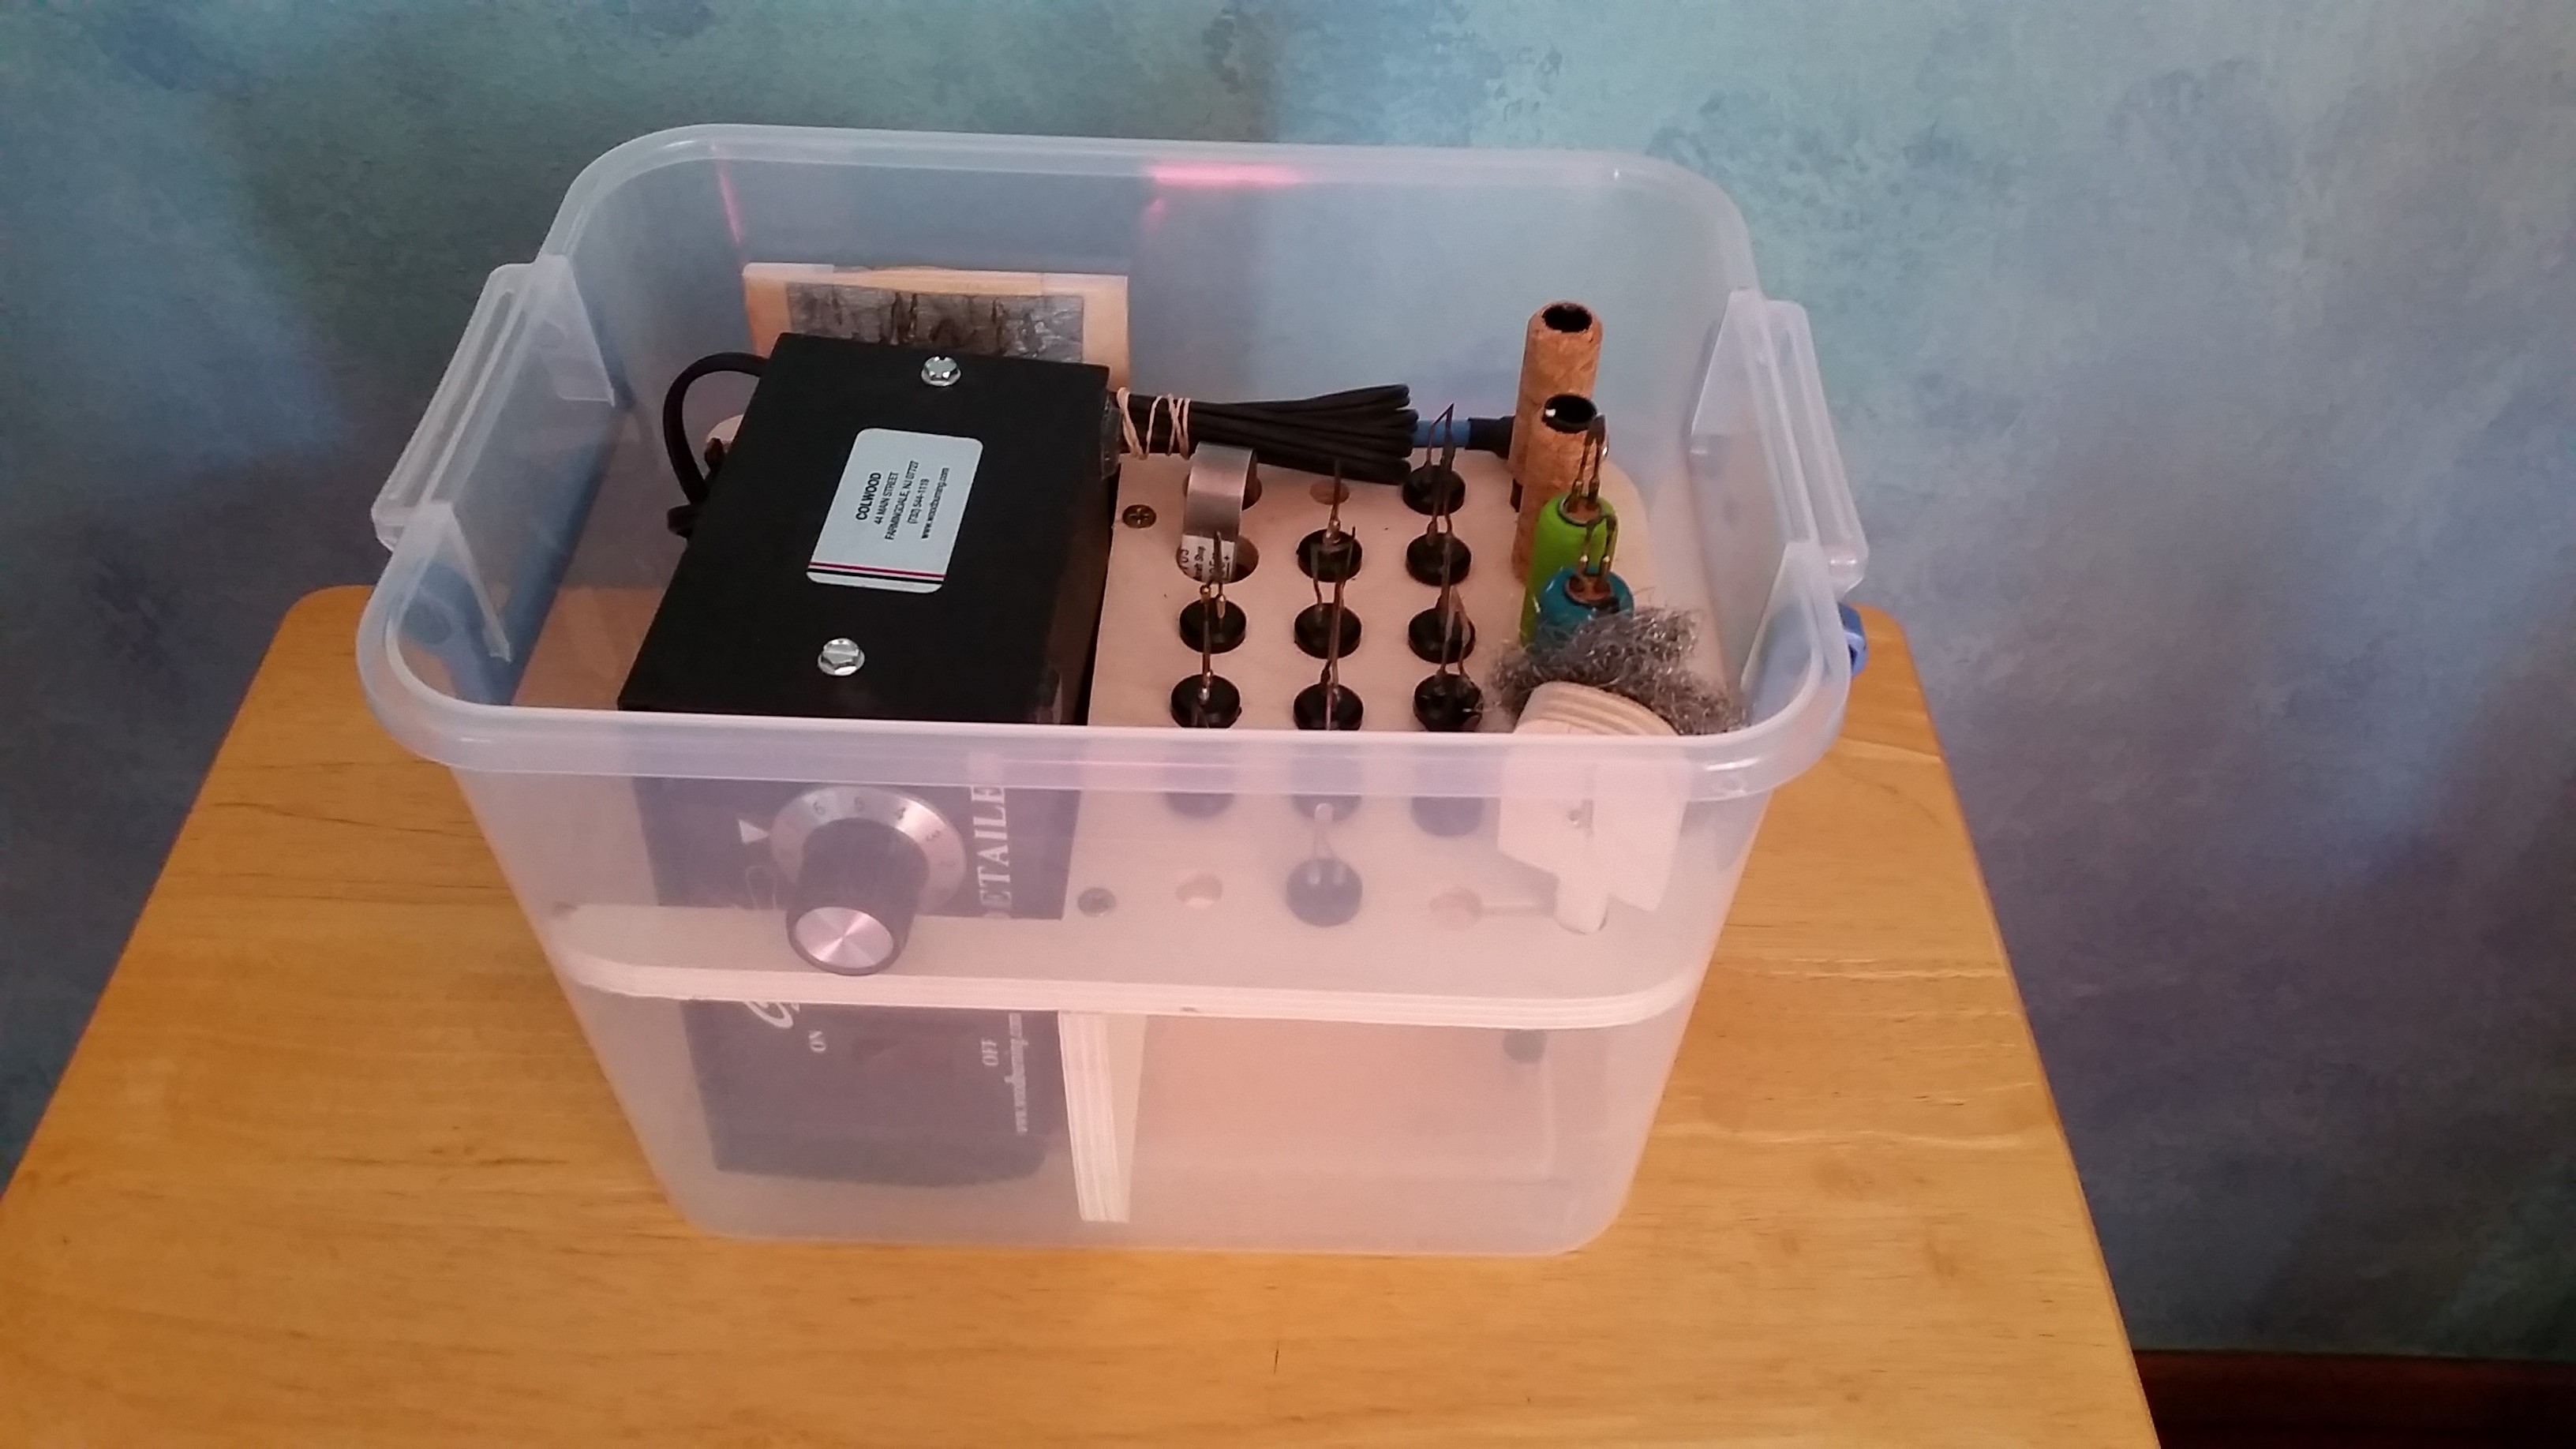
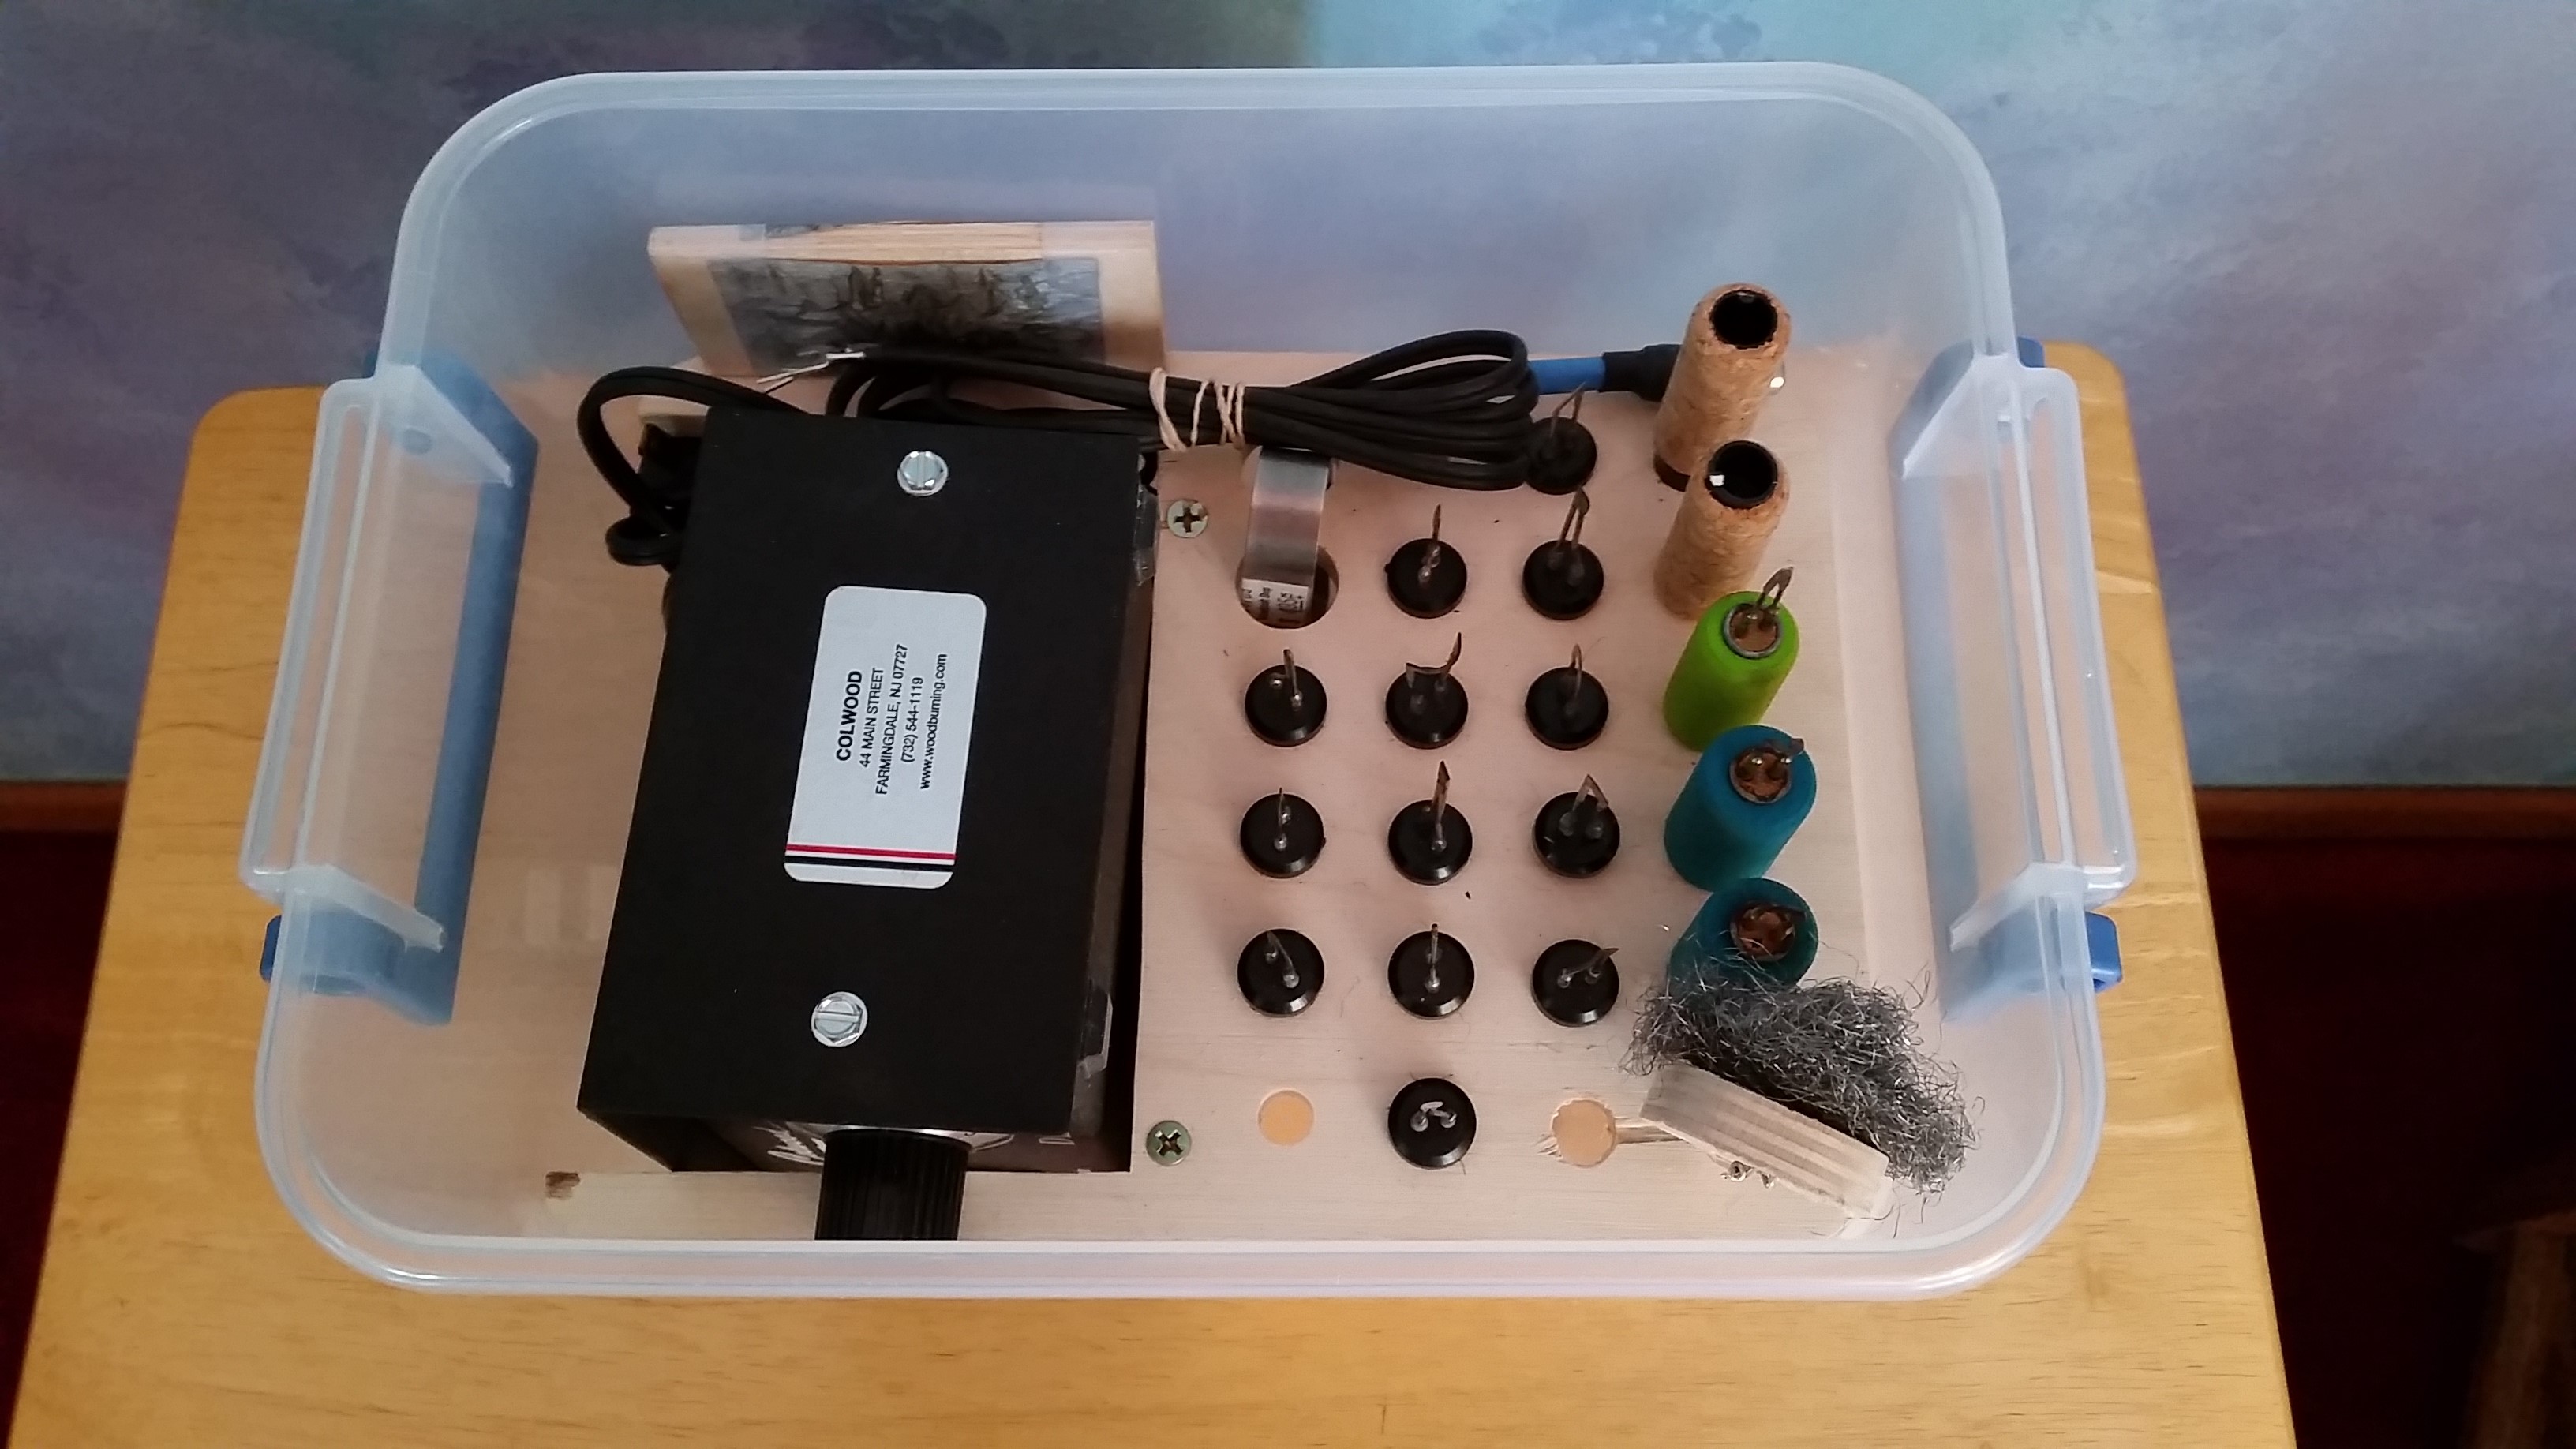
Here are Dave’s instructions and photos on how to create his carving totes – for glue, bottles, and woodburning tools. Dave even tells us where he purchases his totes, what thickness of plywood works for him, and the type of glue he prefers to use. Dave is one organized carver!
Dave Myer’s Equipment Totes
Over the past eleven years I have taken many carving classes and have discovered that I arrive without all the secondary essentials. Items such as a spray bottle with a solution of water and alcohol when encountering dry wood, or just plain water when wet painting. Of course one should have his own bottle of Simple Green and a brush to clean that piece you have spent diligent hours carving. My solution to arriving at class totally prepared was to organize. To that end I have developed a plan that works for me.
To that end I have developed a plan that works for me. Materials needed are a Plastic Box, a thin sheet of hobby plywood and a fast acting glue. Plastic boxes I use are are Sterilite found at stores such as Wal-Mart, or Shopko and come in various sizes. Plywood sheets are the thinner type which can be found close by the balsa wood displays used by hobbyists. They come in 12”X12” or 12”X24” sizes with thicknesses of 1/8”, 1/4” and 3/8”. My preference is the 1/8” and 1/4” sizes. Price range is between $2 to $6 for both plastic boxes and wood. These stores continually run coupon deals that can be printed from their Web sites reducing the over all cost.
Glues I use are the fast drying types. My preference is the Cyanoacrylate glues found at most hobby stores. My preference is BSI www.bsi-inc.com but most others work fine also. The glue comes in various consistencies: Thin, Gap Filling, and Extra Thick. A spray-on Accelerator is used to set the glue. If you make an error there is also a un-glue that can be applied to fix it. You simply apply the glue, spray the Accelerator and you are done. A word of caution: use these in a well ventilated area and don’t get glue on your fingers, as once you spray the Accelerator your finger will become attached also. Keep the un-glue close. Eye protection is also recommended. I should note that although this is a two step process this type of glue is also found in a one step bottle.
The process is rather simple. I gather the items needed to be organized, place them on a sheet of paper and trace an out line around and between each item. Keep enough space between each item to make room for a partition. After calculating the height needed for the tallest item select the right sized box. After determining sizes for the base and partitions, I cut them out with a band saw and sand the edges. You will find that the corners of the box are rounded and the inside bottom of the box is smaller than the top. Thus you will need to round their corners a bit. It may be a good idea to cut out the base dimensions on a piece of paper to drop in the container before purchasing.
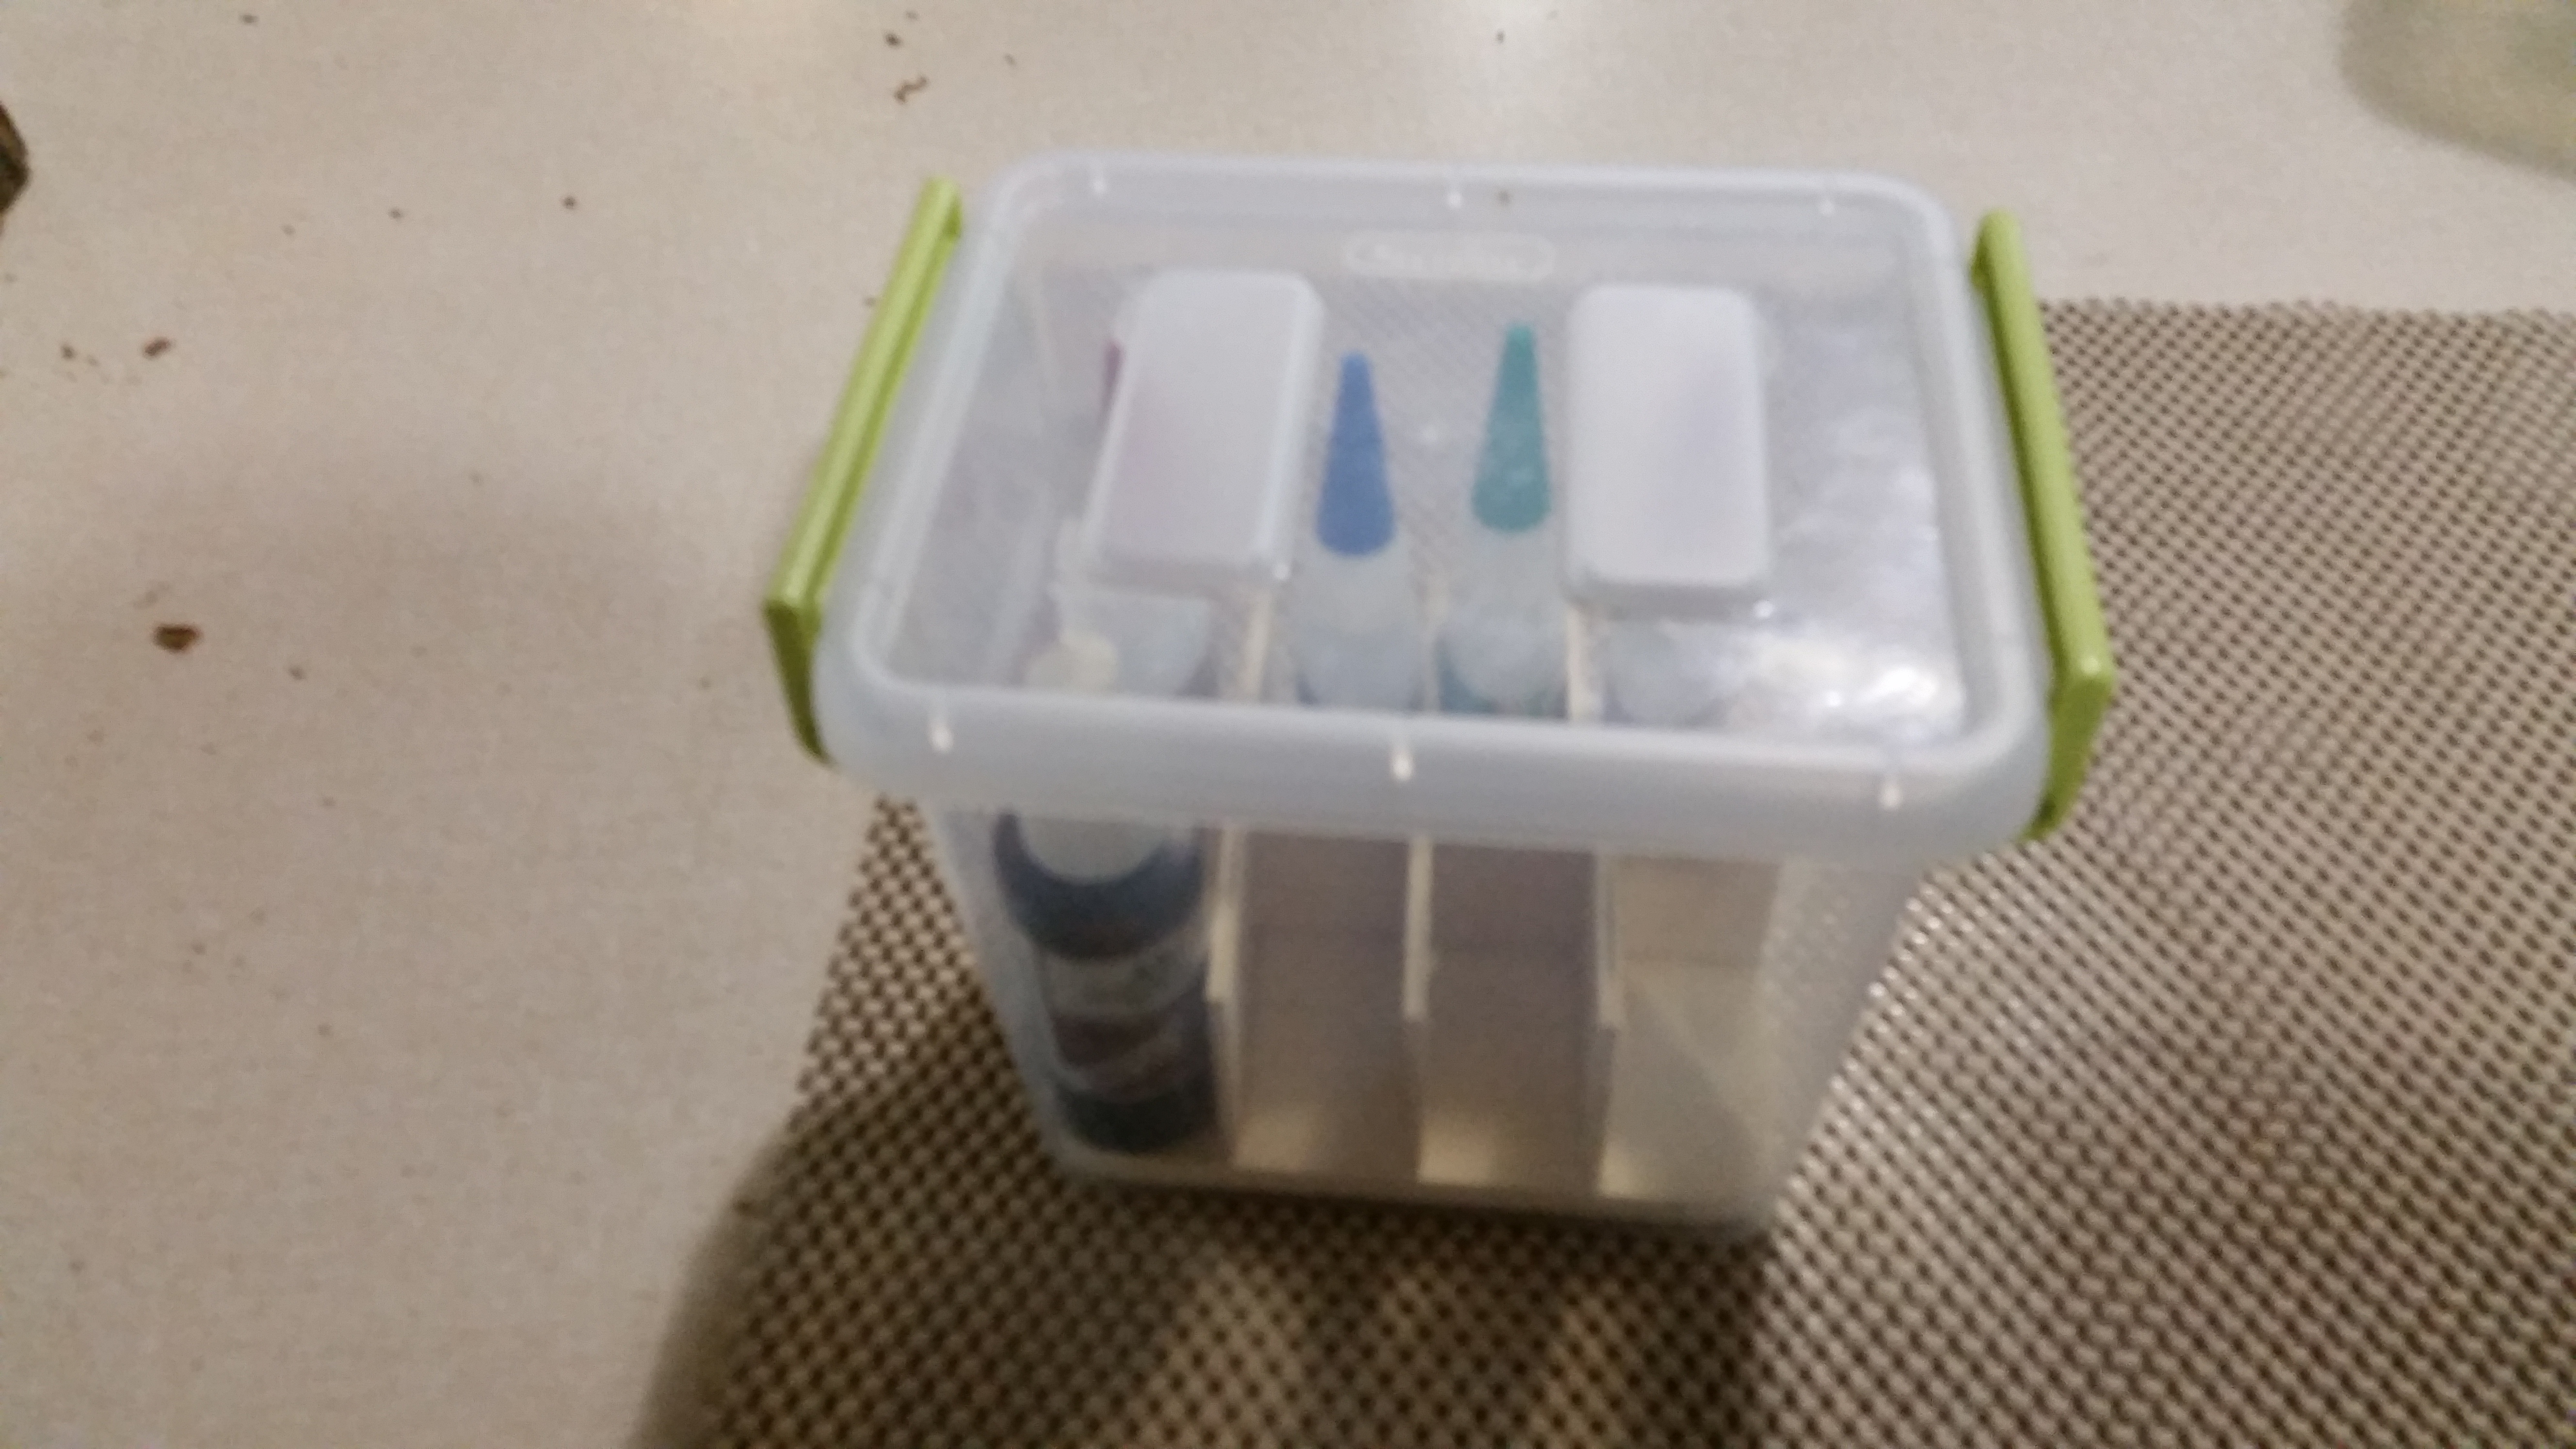
When going to woodcarving class I use a large tote to put my materials in and in that tote is a list of its contents. Included on that list are three boxes. The one with my liquids also had room for a small box of Band-Aids® and a bottle of iodine in case my skin should surround a knife blade. A second box has glues and a third contains woodburning tools, power supply, pens and replaceable tips.


Thanks Dave! I appreciate you allowing me to share your tote idea with other carvers. I also know that I will never be as neat and organized as you are – but it does give me a something to shoot for.
May your wood be plentiful and your tools stay sharp. Take care, carve lots, and always remember to smile.
Peace,
Susan.
![]()

