 A WOODCARVER’S LETTER TO SANTA, AND A WISH LIST
It’s the Holidays! My favorite time of year when all carvers are busy carving presents for the people in their lives, while at the same time the people in their lives are wondering what they could possibly buy for their carver. I thought it would be fun to help them (and you). I went through all the carving-related items I own and love and that I thought would be great stocking-stuffers (and some items that would never fit into a stocking) for your loved ones to buy you this Holiday season. Then I created a Woodcarver’s Wish List as well as a Woodcarver’s Letter to Santa. Simply print them out, fill in the blanks, and Santa (or his helper elves) will know what carving items you are hoping to receive.
The list has 30 carving gifts to choose from, and in case I missed what you really want Santa to bring you, I left a blank space so you can fill it in. For each gift, I included an approximate price. Please consider patronizing one of the wonderful sponsors of The Carvers’ Companion and Woodcarver Online Magazine. They are simply the best!
Here are descriptions of each item on the Woodcarver’s Wish List, with an approximate price. Please refer to all manufacturers’ labels instructions for proper product usage.
30 WOODCARVING GIFTS:
KNIVES
#1 2” Harley Knife The Harley knife, made by Del Stubbs, is named after Harley Refsal, the well-known Scandinavian figure carver. This knife has an extremely sharp edge. The hardness of the steel makes the knife cut efficiently, and while they tell us it should be used on clean basswood, I have personally butchered some cottonwood bark with it. I liked this knife so well I purchased two.Approximate cost: $39 includes a custom fitted sheath (which you want). I believe it is only available from: www.pinewoodforge.com.
#2 Helvie Don Mertz, CCA, Signature Series 6–2 BH, Mini Mertz II Knife This Wood Bee Carver knife has a long blade that is exceptionally sharp all the way to the handle for reaching into those tight spaces. I discovered it at The International Woodcarvers Congress this last June. Don Mertz, CCA, had numerous Helvie knives available. While all of them looked terrific, Don helped me choose this one. I’ve only used it a short time, but really like it because of the blade and also because the handle is big, but not too big. This knife is available in a regular sized handle as well. Approximate cost: $38
BOOKS
#3 The Breakthrough Fish Carving Manual by Mark Frazier, 292 pages This black and white book is a monster. It covers reference material, power carving, mouth, eyes, fin techniques, habitats, bases, installing eyes, and much more. Approximate cost: $30
#4 Dynamic Wrinkles and Drapery by Burne Hogarth, 144 pages This book deals with the system of wrinkles and drapes as influenced by movement. It doesn’t tell you how to carve the folds and wrinkles in clothes, but how and why wrinkles act the way they do, including their anchor points. It is an invaluable resource if you are carving clothed figures, or a very old nude. Approximate cost: $24
#5 The Art of Carving Netsuke by Peter Benson, 167 pages Peter Benson gives us an excellent guide on carving netsukes (miniatures) including eye, scales and feather techniques, tools and nine sweet projects. Approximate cost: $28
#6 An Illustrated Guide to Carving Tree Bark – Releasing Whimsical Houses and Woodspirits from Found Wood by Rick Jensen and Jack A. Williams, 75 pages An excellent guide that also includes a chapter, with photos, describing the seven species of cottonwood that is grown on the North American continent so you can recognize which type of bark you are carving. Now, that is cool! Approximate cost: $15
#7 Relief Carving in Wood – A Practical Introduction by Chris Pye, 165 pages Chris Pye takes you through the process of carving in both low and high relief, illustrated in detail with color photographs and line drawings, including chapters on tools, materials and setting up your workplace. Chris Pye carves for England’s royalty, and teaches in the U.S. once a year on the East Coast. Approximate cost: $20
#8 The Artist’s Complete Guide to Facial Expression by Gary Faigin, 287 pages While this book does not show you how to carve facial expressions, it does explain the eleven key muscles of facial expression and how they affect the face in the six basic human expressions. I enjoy this book and reference it often. Approximate cost: $35
#9 Carving Facial Expressions by Ian Norbury, 64 pages Illustrated with 150 photographs and drawings, master carver, Ian Norbury, provides a range of examples showing many human emotions. I keep going back to this little book because every time I read it I learn something new. At his last exhibit, Ian’s carvings sold for over $20,000. Approximate cost: $15
#10 Creating Caricature Heads in Wood and on Paper – A step-by-step guide for Designing & Carving heads and faces by Marv Kaisersatt, 137 pages While this book has a very long name, three more words, “The Bible of ” should be added to the beginning of the title. It has an immense amount of information, provided by an excellent educator. It is the easiest and most comprehensive caricature guide I own. It was once out of print, but fortunately it is now available. Approximate cost: $25
#11 Whittling Little Folk by Harley Refsal, 137 pages Remember the Harley knife I recommended earlier? It was named after the man who wrote this lovely book which is filled with fun little people to carve. All 18 projects are designed to be done with only a carving knife – no other tools required! Approximate cost: $17
#12 Bible Dudes by Laura Dunkle This sweet little five page pamphlet has all the necessary patterns and instructions (for wood sized 1” x 4 ¼” or 1” x 3”) to easily carve cute figures that look very much like shepherds, wise men, and even a Joseph that would be perfect for a quick nativity set that you can carve in your lap, while listening to TV. You’d have to adapt one of the male patterns for Mary by deleting the moustache and beard, carving a smaller nose, and adding a few wisps of hair, but with a bit of imagination, I know you could do it. Approximate cost: $6
DVDs
#13 Carving Santa Ornaments by Mark Gargac, 100 minutes This DVD combines two styles of carving – traditional full relief as well as a pierced relief fashion, and includes full detailed instruction. Mark’s techniques can be applied to walking sticks, cane and bark. Approximate cost: $26
#14 Carving Woodspirits with Mark Gargac This DVD starts at the roughing out stage, establishing proportions in bark, then the setting in and detailing of the features, hair and beard of a woodspirit. In this DVD and the one above, Mark reminds me of a friendly neighbor who invited you in to watch him carve. He has an easy attitude and before you know it, you’ve learned how to carve a woodspirit. Approximate cost: $26
#15 Wood Carving Basics by David Sabol, 2-DVD Set This DVD covers a variety of different carving styles, including selection of wood, choosing tools, relief, power, and chip carving, as well as finish and painting. Approximate cost: $30
TOOL HOLDERS, APRONS, ACCESSORIES
#16 12 Pocket Heavy Duty Canvas Tool Roll for Palm Tools and Knives Good, simple, easy, inexpensive method to transport palm tools. Approximate cost: $11
#17 12 Pocket Heavy Duty Tool Roll for Larger, Long Handle Tools Same as above, but for mallet, long-handled or European tools. Approximate cost: $13
#18 20 Pocket Stubai Deluxe Tool Roll This custom tool roll has 4 flaps on the inside that fold over the tools to insure they won’t fall out. Velcro holds everything tight after it folds together. Did I need this tool roll? No. I own the two tool rolls listed above. Buying this was a luxury, plain and simple. But, I love toting my tools in it; and my tools appear to be happier traveling in it. Approximate cost: $59
#19 Apron with Suede I really like this apron. It is long and the suede gives extra protection to most of our vital organs. Approximate cost: $25
#20 Palm Pounder Although this palm mallet was created to reduce shock when driving carving tools with your hand, which you probably shouldn’t do (use a mallet if the wood is that hard), after carving for 32 hours at The Congress using all types of tools, wearing this palm pounder stopped the pain I was feeling in my palm. So, I’m sold on it. It has an adjustable wrist strap for a comfortable, one-size-fits-all fit. Approximate cost: $12
#21 Dust-Bee-Gone Mask Yes, this is expensive, but you are worth it. The mask won’t fog your glasses and works with beards. It is comfortable, sturdy, has an adjustable nosepiece and is hand washable. It comes in 3 sizes. I’ve had mine for 6 years, so it has cost me $6/year or .50/month or .12 week. What can you buy for .12 week? Certainly not a new lung. Protect what you have. Approximate cost: $35
#22 OptiVisor I use this over my glasses, to carve and paint eyes, as well as find and get rid of the fuzzies that gather in corners. The OptiVisor comes with different types of lens plate numbers (strengths) available. I checked – mine is a #4. You can also purchase different lens plates. Approximate cost: $46 Additional lens plate: $30
TOOLS
#23 OCCTools Half-Moon Curved Skew Knife At The Congress this year, I met John Valiton, a fellow student in Tom Gow’s bark class, a good carver, and all round nice guy who brought this snazzy tool to my attention. This half-moon skew is sharp, has a nice point and is curved to fit into those tight little corners where fuzzies breed. OCCTools were previously Denny tools; now they are made by Mike Shipley. Approximate cost: $25
#24 Dockyard Micro Carving Tools This 5 piece Gouge set consists of 1.5mm, 2mm, 3mm, 4mm, & 5mm U‑Gouges which I use over and over again especially when carving small eyes, for the part of the eye by the nose, and the bags under the eyes. Approximate cost: $60
#25 Dockyard Micro Carving Tools This 4 piece V‑Parting Set consists of 1.5mm, 2mm, 3mm 90° V‑Tools & 2mm 75° V‑Tool which I use for carving hair, beard, and wrinkles in the clothing of small carvings, as well as crows feet (around the eyes – not actual crow’s feet). Approximate cost: $46
#26 OCCTool “Really Big” Gouge, #3 – 1” sweep or 25 mm I use this and the one noted below on almost every good-sized carving – whether it is bark or basswood. Approximate cost: $26
#27 OCCT “Really Big” Gouge, #5 – 1” sweep or 25 mm I like this and the one above because even the corners of the gouge are sharp and can be used for roughing out a carving. Approximate cost: $26
#28 The Muffer Buffer The Muffer is used on your power drill or Foredom. Made in the U.S.A., you use it to buff your carving after it’s been painted or oiled, then waxed. I found out the hard way that you have to be certain it is spinning in the direction of the wood grain. Approximate cost: $50
#29 Colwood Super-Pro II Woodburning Kit This Woodburning kit has a Detail Pen as well as a Heavy Duty Pen. Both sides can be used for normal burning, but only one at a time. I’ve had this unit for 4 years, and while I am not a pyrographer, I am very pleased with it and how quickly it heats up and cools down (10 seconds). Approximate cost: $180 – depending on the accessories that come with the kit.
#30 Razaire 530 Dust Collection System I’ve owned mine for at least four years and haven’t had a lick of problems with it. I’m not an expert on dust collection, but I’ve been advised that this unite is the smallest, quietest dust collector, rated 530 CFM, which captures more of the dangerous “floating” dust than units with more CFM’s. It is only 11” x 11” x 6” so it doesn’t take up much room on my workbench. It is also easy to move at only 7.25 lbs. Approximate cost: $340 for the unit. Standard replacement filters: $16 2” Filter Frame to add additional filters: $13
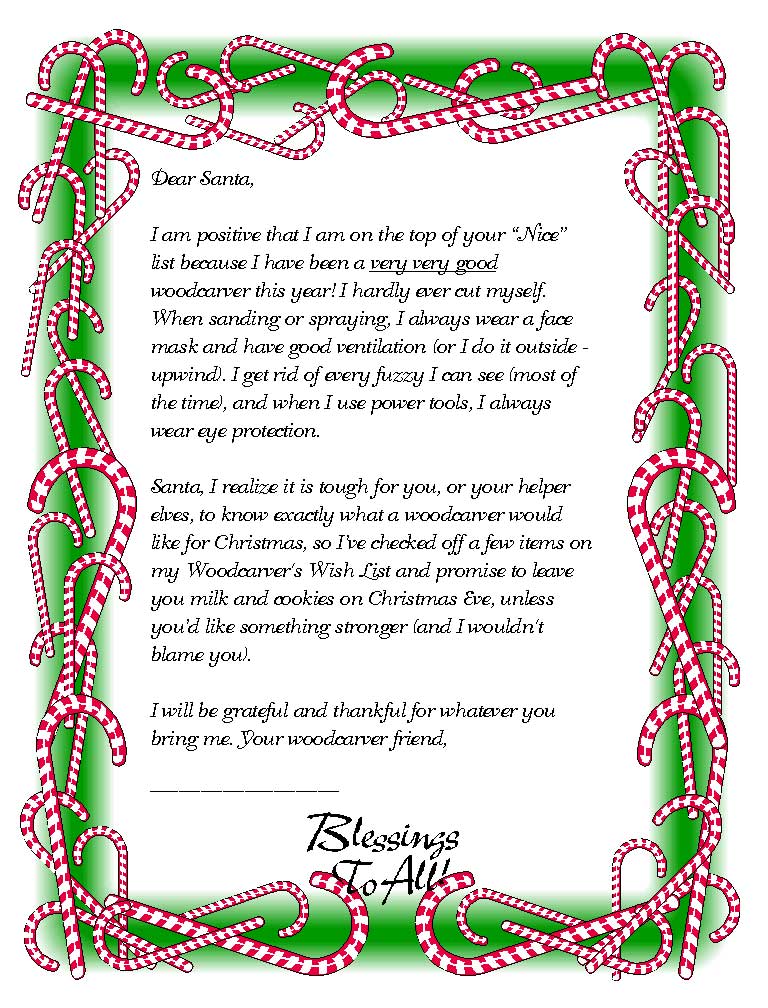
To download a printable copy of the Santa Letter, click HERE
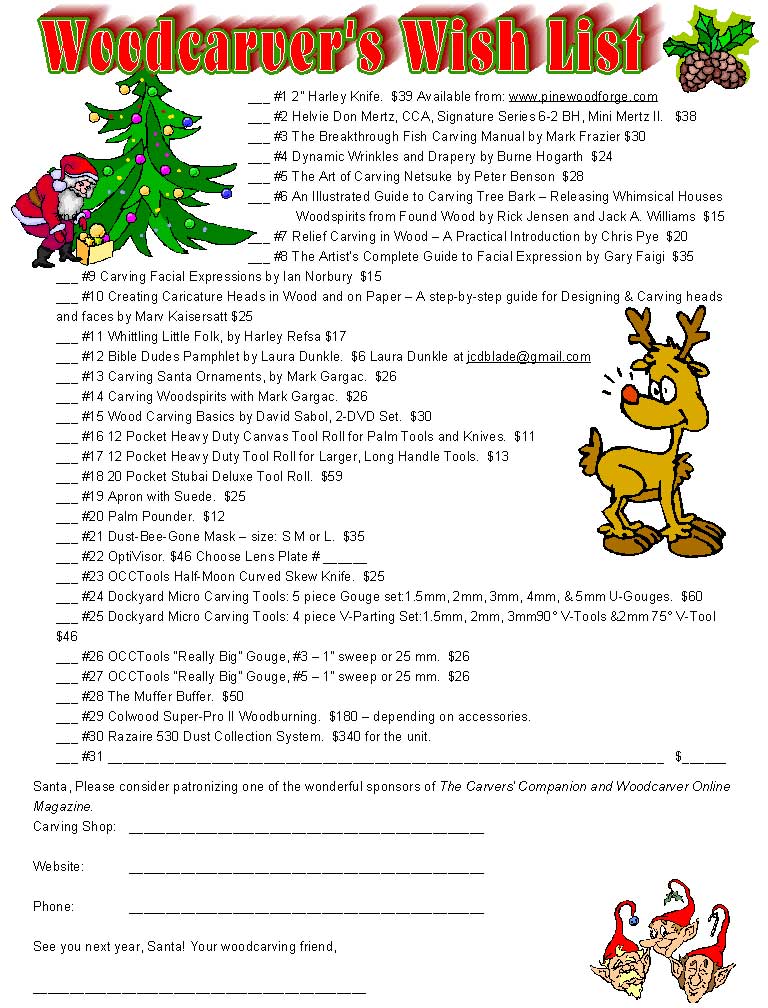
To download a printable copy of the Wish List, click HERE
***
EPIC FAILURES, HUMBLE SAVES OR BRAGS
Congratulations to Richard Houlden for submitting our first Humble Brag, along with photos!
You may have noticed, I’ve added the word “SAVES” to our Epic Failure and Humble Brag title. I think we all find ways of “saving” our carvings from becoming epic failures.
If you have an Epic Failure, a Humble Save or Brag, that you’d like to share with other woodcarvers, drop me an email at SusanAlexanderCarvesonWOM@comcast.net. We’d love to hear your story!
Richard Houlden’s Humble Save and Brag
Before I begin this tale you should know that my story could have been an epic failure numerous times, but ended up as a humble brag, thanks to friends and family.
Here in Virginia, it is the Forestry Department’s 100th anniversary. The James River Woodcarvers Club received a request to carve ornaments for the Governor’s Christmas tree. While not a member of the club, I am friends with a few members who sent the email along to me.
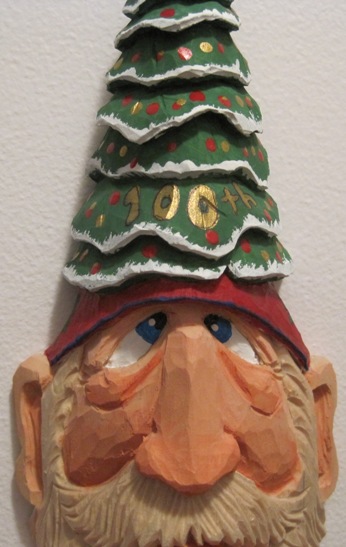
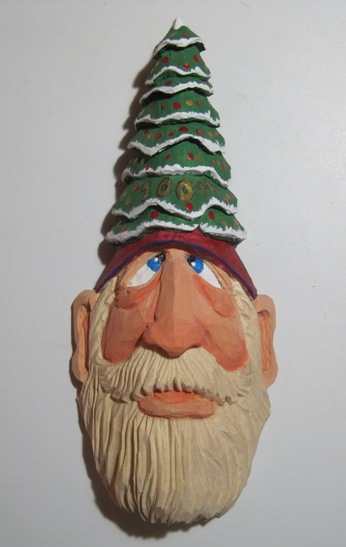
In my mind, where all my great carvings are stored, I decided to carve an elf with his cap being a Christmas tree. That way, I would connect the forestry theme with the holiday. Isn’t it funny when we believe we have come up with a unique and innovative design and think, “Man, this will be cool! I bet no one has ever carved something like this before.” Nine times out of ten, someone already has – but so what? It doesn’t take anything away from the design we’ve created. To highlight the anniversary, I decided to hang a carved sign below the ornament that read, “100th.”
Did I mention I am a stay-at-home dad with a wife and two boys? Even though that email invitation arrived on September 12th, “life happens” and I totally forgot about it
Fast forward to the second week in November. As my wife, Heather, and I are finalizing plans for the holidays, I said, “Oh shoot. Wasn’t I supposed to do a carving for that anniversary thing at the Governor’s mansion?”
My first thought was to back out. Time was short. They needed to receive the ornament by November 24th. But, my loving and supportive wife asked, “If you took the next few days and focused a good amount of your time on the carving, couldn’t you get it done in time to paint and ship off?”
She was right. And even if I didn’t finish it in time, I could always put it in my Etsy shop. So, I go to the garage and spend that evening and the next day carving the ornament, including hollowing out the back portion. I hollow out all my ornaments because the weight of an ornament is an issue that needs to be addressed. After all, it will hang on the branch of a tree.
“Oh shoot” again. I planned on hanging the “100th” sign from the bottom of the ornament. Since I hollowed it out, there is no “bottom” to hang the sign from. Do I have time to carve and paint and finish another one? It’s already November 17th!
Long story short (well not really short) I am discussing my dilemma via email with Susan and without batting an eye, she writes, “If you want 100th on the ornament, consider painting it (in gold?) on the third (widest) branch from the bottom. Painting numbers is a lot easier than carving numbers. You could burn it in, but the tree would have to be a lighter shade of green for the burn marks to show up.”
Shortly thereafter, my wife walked in the door. As we sat down to share the events of the day I told her Susan’s idea. Heather agreed, “That would work and save you a good amount of time in the long run.”
So that is exactly what I did.
Let me quote Dr. Seuss, “Think left and think right and think low and think high. Oh, the thinks you can think up if only you try!” I pulled the forestry department’s red and green logo off the internet which shows a stream flowing between two tree silhouettes.
Virginia Dept. of Forestry Logo
I matched the logo’s colors; their green for my tree and their red for the elf’s cap. On each side of the cap I painted a tree silhouette, and in an effort to tie everything together, I added a blue line along the brim of the cap/Christmas tree to reflect the stream. I was very pleased with this and it arrived at the Forestry Department a day ahead of their deadline.
I was so happy to receive a “thank you” email from the man in charge of gathering the ornaments, John Campbell Director, Public Information Division, Virginia Department of Forestry. Here is an excerpt.
“It will be a showpiece on the Governor’s tree this year and will adorn the VDOF tree next year and every year thereafter. In addition to the beautiful carving, the personalization you added to help us celebrate our 100th anniversary is such a special touch.”
As Dr. Seuss said, “Think left and think right and think low and think high. Oh, the thinks you can think up if only you try!”


***
E‑MAILS
I received an email from a fellow carver, Rich Neely. Here was Rich’s question:
I’ve been trying to find some tips on carving a female face. There are some videos on You Tube, but nothing I’ve seen tells me how to make a face with distinguished female traits. Can you recommend a source such as YouTube videos, books, or chat room discussions that will help me out?
Thanks in advance for your help, Rich
Hi Rich, I’ve checked through my carving reference library, and the only book I have (but, it is a good one) regarding female faces is Carving Classic Female Faces in Wood – A How-to Reference for Carvers and Sculptures written by Ian Norbury and published Fox Chapel Publishing Co., Inc.
This is a shout-out to our readers. If you have additional tips on carving female faces that you’d like to share with Rich and the rest of us, drop me an email at: SusanAlexanderCarvesonWOM@comcast.net and I’ll pass it on in our next issue.
***
Until next time, gentle reader, I wish you a Blessed Christmas. May your wood be plentiful and your tools stay sharp. Take care, carve lots, and always remember to smile.
Peace,
Susan.
![]()


Recent Comments