

|
The One Tree ProjectBy Dan Blair (Editor's Note - A version of this article originally appeared on the FC2 List.) Ever heard of the One Tree project? If you do an internet search on it, you will probably be as amazed as I was to see that it is much more than just a local activity. In fact, it has grown to become almost a world-wide endeavor. I was impressed to see how many places around the globe have been (or are currently) part of the program. There is a lot to read about it online, and I admit I haven't taken much time to enlighten myself with all there is to know about it.
Wet wood does not bandsaw well. Even though I had been drying this piece for five months or more, it was still quite wet inside. Long story short, the blade bound up in the soft build-up of wet saw dust and.... "WHAM!!!!" Broken blade. I could have shut down and headed for Sears for a new blade, but that was a 10 mile round trip taking more time than I thought I had to spare. Instead, I just attacked what was left with my Makita and that rotary chainsaw carving tool. After roughing out the shape and basic features of the fish, I began the sanding process by using disc sanders in my Foredom tool. Much of the sanding gets done that way when I am working on the bigger pieces. And after that, I refine the sanding by switching to my soft-sander, the drum with "soft" foam rubber backing which can accept flat sandpaper in just about any grit you choose, other than the very coarsest sort. (I most commonly use 80 and 120 grit.) To give you a better picture of just what it is that I was carving, imagine the log standing upright on its widest end. (see photo #1 showing in process) Consider that as a stump that a beaver, a logger, or the wind took down, and on which there is still a large spear of wood protruding skyward. Then pretend you have caught a BIG trophy trout and are looking for the ideal way to display it for pictures before taking it home. *!!!!* Why not hang it, head up, from the top end of that snag? Hey! That works for me. And so I did. The next process was to make the birch stump look weathered. For that, I went back to the Makita with the chainsaw and shaped the spear to a point and roughed in the creases and cracks that one would expect to see on weathered wood. Before I finished the look of old wood on the upright portion, I primed and airbrushed the fish the way I normal would have except that I had to mask off the area that was not fish before the painting began. Once the fish itself was painted, I could use a conventional brush to add the colors common to old and weathered driftwood, etc. It worked!
Good luck and good carvin'.... Dan B ~ FC2 founder/moderator Dan Blair is founder and a moderator of the Fish Carving 2 (FC2) Yahoo group. See more of Dan’s instruction, tips and photos at Fish Carving A2Z, and Fish Alaska, other Yahoo groups
|
Copyright 2012, All rights reserved. May not be reproduced in whole or in part without prior written permission. |
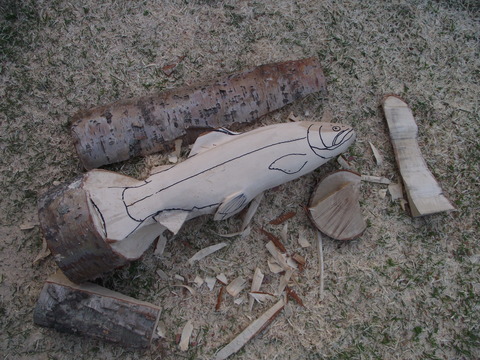 I first became curious about the One Tree project when I was invited to take part in a comparable project here in south-central Alaska. The gist of the idea is to take just one tree and see how many different items can be crafted from it. In the case of the One Tree project I joined, the tree was a tall birch tree that had to be removed to make way for the widening and reconstruction of a road. I signed up and asked for a two foot + section of the trunk that is roughly 12 inches in diameter. From the 30" log they gave me, I split off most of one side to make myself a flat surface onto which I could trace the pattern for a 24" winter phase rainbow/steelhead trout. I intended to cut out the tracing on my bandsaw and then rough out the rest of the fish with the Lancelot Carver in my Makita 4" grinder. OOPS! Bummer!
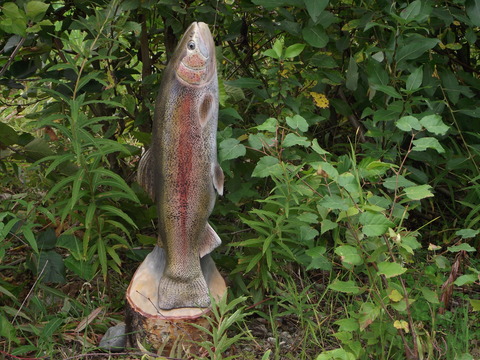 Here is the finished carving. I hope the results will encourage a lot more foks to get actively involved in their own One Tree project. I highly recommend it to all of you in hopes that you will encourage your own carving clubs and organizations to look into having a One Tree project of your own at your next big get together. I think it is a great idea and numerous One Tree projects around the world seem to agree. Check it out and see if you do too.