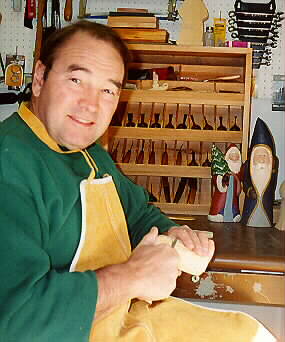
Notes from the Net
by F. Pierce Pratt <fppratt@ppco.com>
"Notes from the Net"
is a column compiled from a few of the email messages posted to the WoodCarver Mailing List. In these messages are the tips, hints and other tidbits traded each day between WoodCarver participants. There are so many messages to choose from that it is difficult to select only a few to include in this column. Some editorial changes were necessary, but, for the most part, each message appears as originally posted and attributed to the sender. If you have a favorite post or subject that you would like to appear in this column, please email me directly <fppratt@ppco.com>
MAKING GOUGES FROM NAILS
From: Dick Allen <rja1@PioneerPlanet.infi.net>
Last weekend at the Wahpeton workshop, one of the carvers demonstrated making a gouge from a concrete nail by heating and working it with a hammer on an anvil. The heating removes the temper and the blade can be worked with a file. After the blade is shaped and basically sharpened, reheating and quenching in a cup of water will return the temper. The temper is checked by running a file across the blade. If it cuts easily, reheat and quench again. The temper process is trial and error but practice will give better results by watching the color during heating. The carver had some small gouges that had been used for several years.
From: Les Hastings <hastings@gisco.net>
If you can get your hands on some power hacksaw blades, they make excellent knives. They are extremely hard, yet retain the flex needed for a good knife. I have a fillet knife made from one and a couple of Cajun style long blades. They stay sharp forever. Old table saw blades also produce some fine knives, but you lose some of carbon in the cutting process and it deteriorates the original quality of the steel. Cut too much and lost your thing on concrete nails. They are made from the same steel as files, in fact file manufacturers also produce concrete nails.
From: Robin Edward Trudel <rtrudel@yahoo.com>
Here's a tip: If you have to keep your tools in a damp cellar, save those "desiccant" packages that come with shoes and electronic equipment and keep them in your toolbox. They'll help with the rust on your little-used tools. A light coat of oil or paste wax helps too.
From: Thierry Varem-Sanders <TVarem@NRCan.gc.ca>
If you need to clean up carving burrs or table-saw blades, there are commercial mixtures of potassium hydroxide available that clean these without damaging the bits. However, a cheaper solution is to spray them with oven cleaner. It happens to be the same stuff, and works well.
From: Ivan Whillock <carve@whillock.com>
There are generally three kinds of hand tools: palm tools, mid-size tools, and full-sized tools. Carvers who hold the object in one hand and carve with the other generally prefer palm tools. Palm tools are generally unknown in most parts of Europe. Their use for carving has developed mostly in the US.
The mid-sized tools, seen in areas of Germany and the Alpines, are often preferred by carvers who carve smaller figures but hold the carving in a stand (carver's screw). Check the tool to see if it has a shoulder. That is usually a malletable tool. Mid-size tools range from 8-10 inches in length.
Full-sized tools are generally preferred for two-handed carving because they are large enough to accommodate both hands. Carvers who do relief carving and statuary generally prefer them. They range in size from 10 inches and above. Full-sized tools can withstand malleting in hard wood (though NO tool will take prying or twisting).
From: Ron Wiener, Woodcarver <ron_wnr@ix.netcom.com>
I still use old fashioned oil stones. When I need to grind the edge, I use a coarse wheel. Most of the time I can get by with a coarse india to take out nicks in the edge. For preliminary honing I use a hard arkansas.
Usually, I simply need to hone the edge for easier carving. For that I use a basswood wheel dressed with Sears white polishing stick. It's not fancy but it's firmer than a felt wheel and I can make many different shapes of wheels from basswood. The wheel warming up with friction will liquify the white polishing stick.
To clean off the honing compound I hold the gouges against a couple of cloth wheels. But, I don't use the cloth wheels for taking down the edge. It will round over too much. Finally, I pull the cutting edge from between my thumb and index finger (I pinch the tool) to deposit a micro film of body oil onto the tool.
From: Joe Dillett <jdillett@thecarvingshop.com>
Sharpening techniques are as diversified as there are carvers. We find what works best we but still look around for better ideas. There was a comment earlier about the time spent in sharpening. On an average 40 hour a week carving, I sharpen about 10 minutes. The sharpening time not only relates to the sharpening equipment, but also the care taken with the tool between sharpening. How many carvers come to a meeting with their tools laying in the bottom of a box banging together. It takes an hour to get all those nicks out.
Another thing I noticed is wiping the tool with your fingers. I feel this is bad for the tool. Your hand oil has a corrosive quality, evidenced by a rusty thumb print on a saw blade. That slight corrosion will eat through the micro edge of any carving tool and make it dull.
I've got several methods for sharpening depending where I'm carving. If I'm in the shop, I use a 1 3/4 inch wide by 10 inch diameter wheel turning at 150 RPM, that has a leather strap glued to it. I use green rouge (.5 micron abrasive). At 150 RPM almost no melting of the wax occurs so I get almost no buffing compound stuck to the tool. One stick of compound lasts me years. To get to inside shapes, I have a 4 inch long leather piece cut to a vee shape, that I stroke a few times on the inside of the tool. If a tool ever needs to bereshaped or a nick taken out, I use a cheap bench grinder with an 80 grit vitrified wheel. I go from the 80 grit directly to the leather wheel.
I also have the oil stones and soft felt buffing wheels I use for demonstrating or when I'm working on site. Basically all the systems out there work and your job is finding the one you like.
From: Jo Craener <JO_CRAEMER@prodigy.net>
I'm a (retired) Navy nurse, and can confidently state that superglue DOES have a place in your first aid kit. Of course if sutures are needed, get-thee-hence to the doctor. But if you CAN'T for some reason, it's good first aid, and often all you'll need. From personal experience, I can tell you that this works very well.
After you clean the wound with soap and water (no antiseptics needed, just lots of soap & running water) and when the bleeding is more or less under control (use pressure), cover the hole in your hide with a "scab" made from the superglue GEL (the thick stuff). It forms a hard, thick cover that allows healing to occur underneath it a lot faster than a cloth bandage. It's more or less waterproof, and it stops the pain almost like magic. If you don't abuse the "superglue scab" it'll last a few days. You can always add more glue if necessary till you're healed. A secondary advantage is that it keeps blood off your carving! A thin smear of the gel superglue over an abrasion also works magic, stops the pain, and keeps it clean.
Some suggestions: Keep a few small squares of women's nylon stocking tucked in with the superglue container. If you have a fairly large cut, and need to hold the edges together, then place the nylon over the (cleaned) wound, with the wound edges pulled together and aligned. Then cover the wound with a nylon patch and glue it to the skin on either side of the cut. You can even put glue over the entire patch. It will help keep the wound surface clean. This glued-on patch will neatly keep the edges of the wound together just as well as a traditional medical butterfly bandage, probably better. For really deep cuts you need deep sutures to bring all the tissue edges together, from the bottom of the cut to the surface. Otherwise you'll get a "pocket" () under the closed skin that'll fill with blood and fluid, will take forever to heal, and is susceptible to infection.
From: Stephan Toman <RToman1120@aol.com>
Just keep your tools razor sharp. A sharp knife is safer than a dull one, and though it goes to the bone when you slip, the cut heals fast and neat. I think I've got not less than a dozen scars on my left hand, but I've never had to get stitches: I taped the cuts with butterflies and let them heal. Seriously, I've been carving professionally for about 13 years now and I generally slice myself no more than once or twice a year. I think that the worst cuts happen to newbies because they lose track of what they're doing or of where their hands are. And, to experienced carvers because they are over-confident and can let their concentration drift without messing up the work. There seems to be a period of several years in between where you actually are so focussed on the work that you rarely slip; enjoy it while it lasts. Of late, most of my nicks have come because I was moving too fast to make a deadline and/or because I had been carving for 9 or 10 hours without a break and was overtired.
From: Wayne Reimer <wreimer@direct.ca>
I tried a couple of fishing gloves, but I found them a bit thick. A couple of months ago I found gloves that work great for me. I went to a law enforcement supply store and bought a pair of cut-proof/stab-proof glove liners. They cost about $15.00 a pair and are made of a material called "Spectra". This stuff is the next generation of material after Kevlar. The gloves are very light, about the thickness of cotton gloves, washable, form fitting, and a bit stretchy. The manufacturer claims they have three to five times the cut resistance of Kevlar. I've been using them for a while now. The bloodshed has stopped. They're comfortable and you've gotta work REALLY hard to cut'em. They're good stuff! Even my wife, who has a stained glass business, has started using them and loves them!
From: Thierry Varem-Sanders <TVarem@NRCan.gc.ca>
The reason why cracks form in logs is because there are two types of shrinkage. One kind is called radial. This is shrinkage from the outside to the middle of the log. The other is called tangential, which is shrinkage in a circular direction around the center.
The reasons why cracks form are two-fold.
1. One reason is that when a log dries, the outside dries faster than the inside. This results in tangential shrinkage occurring faster than radial shrinkage, resulting in a stress in the wood. The log must crack to relieve this stress. The best way to relieve this kind of cracking is to make sure that the wood dries slowly, and that the ends are sealed. This will allow the entire log to dry out evenly so that stresses do not build up.
2. The other reason for cracking is that wood has a different structure in the tangential direction compared to the radial direction. In the radial direction, there are rays (which do not shrink), and which reduce the net radial shrinkage. As a result, even if you dry the wood evenly, internal stresses will still occur. There are several ways to deal with this: (a) quarter saw your logs so that your final carving does not include the center, (b) carve the log in such a way that the center of the log is disrupted; ie by drilling the center out, (c) allow the stresses to deform the log rather than crack it by forcing a crack in a specific location, (d) use a type of wood with very few rays, very tight old growth rings, very even density across each ring, or with very distorted rings (burls). This minimizes the differences between tangential and radial shrinkage so that very few stresses build up.
In a nutshell, if you change the environment of the wood, the moisture content will change, and it may crack due to differential expansion/contraction. If your carving contains the center of the log, these cracks may be permanent. I have noticed that if the carving contains mostly reasonably straight grain, and does not include the center, the cracks tend to heal after the wood has adjusted to the new environment.
From: Joe Dillett <jdillett@thecarvingshop.com>
I seal the ends of logs with old varnish that is left in the bottom of the can. If the bottoms of the varnish cans get some skin or dirt, just dump them together (don't mix water base with oil base). To keep the little bit from drying up in the bottom of the can, put a skin of plastic wrap in the can, or use a plastic container and squeeze out all the air.
Plumbers wax gaskets for setting toilets, are very good for sealing ends. They are playable, sterile, and easy to apply over the entire surface. Plumbers wax gaskets are also very good for fixing wounds on living trees. The wax seals the area and keeps out the water and bugs. They are available at any hardware store. Caution, they stay sticky over the years, so you may want to cover the ends with plastic wrap to protect your clothing during handling.
From: Anima Von Scheele <anita.von.scheele@mailbox.swipnet.se>
Wille Sundqvist (who wrote the book Swedish Carving Techniques) is one of the most famous folkart-carvers in Sweden. The method he describes: take a boiled potato, mash it, and rub it on to the wood. This is a very old and very good technique that never fails on green wood carving. It is not necessary to place the piece on a warm radiator. You can just leave it as it is and then carve orsand away the potato when it's dry and hard. It does get hard.
Also, if you have a log that is not yet dry enough and has to be stored for a year or two: rub the potato in at both ends to prevent splitting. It works well.
From: Peter Villomann <VilloArts@aol.com>
If you ever want to test a piece of wood to see how the grain will be highlighted during finishing ... wipe it with denatured alcohol. The wet effect from the alcohol simulates a finished appearance enough to help you select grain features and whorls.
From: Stephan Toman <RToman1120@aol.com>
I have been making signs for a number of years, so I've done a bit of digging for information about gilding. While modern gold paints and lacquers often look like the real thing, they can only be used inside. The metals in them will tarnish quickly if used outdoors. For exterior applications 23K gold is required. It will never tarnish and will last as long as the varnish sizing stays intact.
Real gold is a bit tricky to apply. You should read up on oil-based gilding before you find yourself frustrated, covered with unusable bits and pieces of gold, and a sign that has gold everywhere but where you wanted it to be.
Here's a neat trick that I discovered after years of struggling to keep the signs looking clean: If you try to put gold on after the sign has been painted, flecks of the gold, too thin to get off, will catch in the paint. You will end up trying to retouch all the painted areas to cover these flecks. The sign will have noticeable brush strokes around the gilding. To prevent this from happening a simple mixture of egg white and warm water(called glaire) is used. Mix up one egg's worth of white with 1/2 cup of warm water and liberally brush it over the entire area to be gilded. Don't worry about getting it where the size will go as the solvent in the size will cut right through the egg white. Let the surface dry out, then apply the size according to instructions.
Apply the gold after the size has dried. When everything is done, take a wet sponge and wipe off the covered area. The glaire with gold flecks will clean right off and the sign will be clean and neat.
Thank you, Pierce Pratt
email:fppratt@ppco.com, (918)661-9703, fax(918)661-0243
slowmail:F.P. Pratt, 1290G Plaza Office Bldg., Bartlesville, OK 74004