
Editor's Note: I know of no one else that makes diamond willow jewelry, so I am pleased to present Bob Gander's work to you as something unique and delightful. Enjoy!
Two things got me started making jewelry and ornaments
out of diamond willow. One was a comment made by a woman who saw
some of my other work and suggested that earrings would be a nice
thing to have. This was at a time when wooden jewelry was relatively
popular. The second thing that got me started was a surplus of
small pieces of diamond willow. Some of these were too small to
be used for my usual craft objects, and some were too rotten to
do much with. Willow is quite resistant to rot, which is why it
was used for fence posts when the Prairies were being settled.
The bark over the diamonds and the wood just under that bark is
usually the last part to be affected by rot.

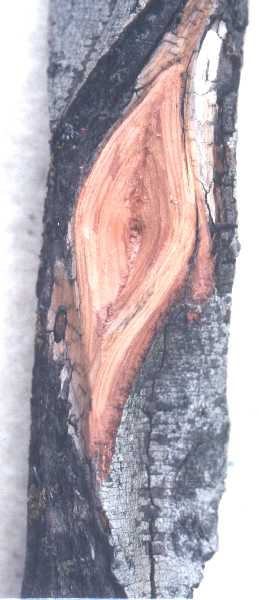
This piece (above) has bark over the diamonds while that over the sapwood has fallen off and the sapwood is badly rotted. It is not obvious from the picture, but in this case virtually all of the heartwood was still in very good condition. The bark on the top diamond has a small crack in it. This means there will also be a check in the underlying wood. The bottom two diamonds appear to be in good condition, and they will need to be investigated by removing the bark.
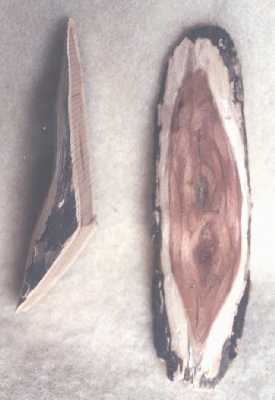
This is a diamond with the bark removed (above). The diamond immediately below and connected to it has a check in it and will be sacrificed in removing this diamond. The rotted sapwood appears white in the upper right of the image. There is a small area on the lower fringe of the diamond that shows some rot. If the diamonds are spaced far enough apart, then a bandsaw or hand saw can be used to cut it off the main stem. However, if the diamonds are close together and if as many of the diamonds as possible are to be harvested, then I use either a rod saw or a coping saw with a spiral blade on it to cut the diamonds out.
Besides just wanting to get the most out of a piece of willow, there is a practical reason for wanting to get closely adjacent diamonds. When making a pair of earrings, it is important to match the diamonds for shape and color as closely as possible. Diamonds from one stem will tend to have similar shapes and coloration. Neighboring diamonds may not be a good match for size, but the more that are harvested, the more choice there is for matching.

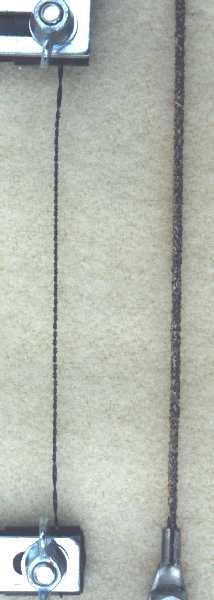
This image (above) is a closer view of the two blades. A rod saw is a steel rod with abrasive grit bonded all around it. It is intended for cutting ceramic tile, so it holds up well when cutting the much softer willow. The spiral blade of the coping saw also has teeth in all directions. These blades allow cutting to occur on different sides as the blade moves through the cut. This allows a three dimensional curve to be followed.
These two diamonds have been cut out with a bandsaw. The one on the right is a double diamond, that is, two diamonds that have merged together. These are now ready to have the wood on the side and back removed.

The tools above are my 4 favorite tools: a bench knife, a shallow sweep gouge, a deeper gouge, and a narrow deep gouge. The actual size and sweep numbers probably are not critical as they have been acquired more through accident than intent.
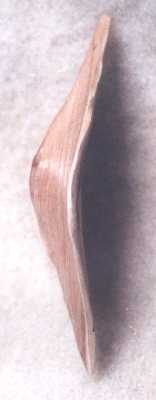
This diamond has had the wood removed from underneath the diamond and the sides have been trimmed. In this case a small rim of spalted sapwood was left around the edge of the diamond. At this stage I use my fingers as a crude set of calipers to get approximately uniform thickness in the wood. I aim for 1/16 inch (2 mm), but there is certainly some variability. The tip where the jewelry mounting is to be done may be left a little thicker. The diamond is now ready for sanding.

The 5 bits (above) on the right of the image are ruby carving bits. The top 2 on the left are cutting burrs made by Dremel. The bottom 3 on the left are diamond burrs purchased through Lee Valley.
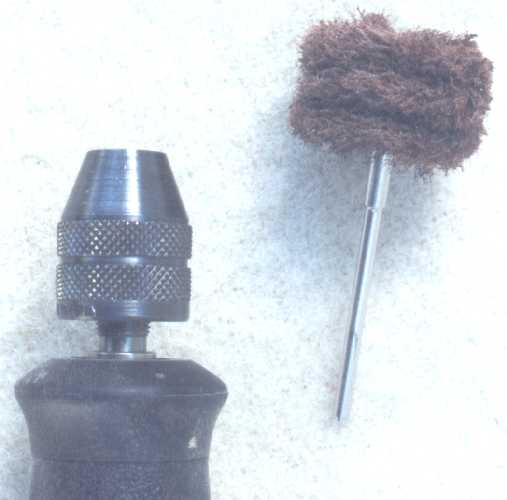
The image above shows the variable chuck on my battery-powered Craftsman (Dremel) power carver. The brown thing is 3 layers of brown Scotch Brite mounted on a mandrel. I use the ruby and diamond bits to rough sand the concave portions of the diamonds that cannot be reached by hand. I also have a cushion sanding drum that can be used. I usually power sand to about 220 grit and then hand sand to 400 grit. I may or may not use the Scotch Brite pad for final polishing. It does a nice job, but you need to wear goggles to keep the little bits of fibre out of the eyes.
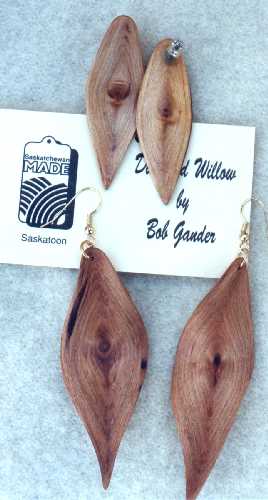
After the final sanding, I either use epoxy to bond stud mounts on the back (above), or I drill a small hole for a ring that joins a shepherd hook. I usually finish earrings and brooches with urethane. This provides a little additional strength to these somewhat fragile creations. I don't usually pierce carve the earrings and brooches. That is, the subject of the rest of this article. (The card is a tag that is the size of a standard business card. The bottom pair is a little big to be fashionable these days, but jewelry like all fashion goes through cycles.)
Large diamonds can be used for hanging ornaments rather than jewelry. Some of these I have left plain. More recently, I have experimented with pierce carving them. I learned this technique from Frank Sudol, an expert turner of very thin-walled vessels. If I am going to do a leaf, then I leave a little extra wood at one end to make the stem. For pierce carving, the thinner the better, but equally important is to get uniform thickness. I have found this difficult to achieve with deeply dished diamonds. Once I get the diamond to what I judge to be about the right thickness, I sand it to 180 grit and mark the design on the "good" side. I then drill small pilot holes (see above photo); these help me to see if I have achieved a uniform thickness, preferably under 2 mm (1/16 inch). [I recently purchased a pair of proportional calipers that may mean that I can skip this step.] I use my Dremel on low speed to do the drilling. I also drill a small hole in the stem that will be used to suspend the ornament.
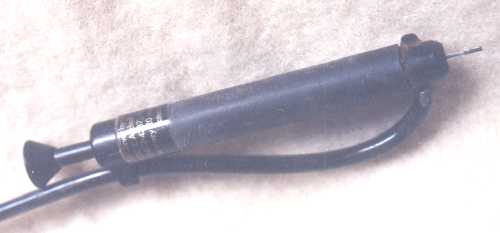
This is an Ultra Speed Products Turbocarver, (see above photo) <http://www.turbocarver.com/> which is a high-speed (>300,000 rpm) air turbine tool. Like all air turbine tools, it has a low torque, so it isn't likely to damage the piece if too much pressure is applied. These are some of the bits that I use. These are all 1/16 inch shaft bits that are pushed into the friction grip chuck of the Turbocarver. The two on the left are carbide dental burrs. These are used to do the actual carving. The middle one is a diamond point that is used to clean up the edges of the cut-out parts. The flame bit is a finer grit abrasive that can also be used for clean-up. The ball shaped bit is also a diamond bit. I don't use it much on the diamonds, but it seemed to be handy when I played around with a deer antler.
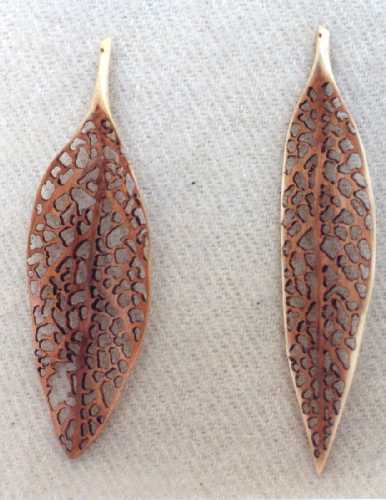
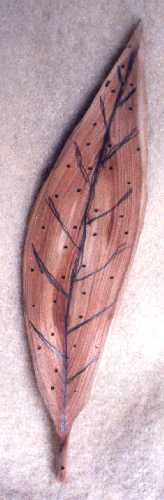
Here is the final product, above. After the pierce carving, I sand them by hand to 400 grit, insert thin monofilament fishing line, and urethane. The concept of these leaves is that they represent leaves that have fallen and have started to decay leaving a web of cell walls. The left hand leaf has a broken out area in the lower part. This was accidental in this case, but many real leaves show similar effects. On occasion, I have intentionally had a large gap go out through the outer rim. This can look OK, but it makes it more susceptible to snagging on something. I have made a few with Christmas motif cut-outs: bells, candles, snowflakes, snowman, and tree. I found that cookie cutters are a good starting point for thinking of stencil designs. I have recently looked through a couple of books on scroll saw patterns. These would also make good reference material. There were even some feather designs that would transfer almost exactly to diamonds.