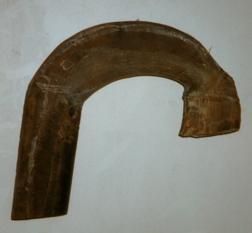
One may have to heat and squeeze the horn in several places to get the required shape but care taken at this time can prevent a lot of work later when a lot of the horn has been removed and there is less margin for error.
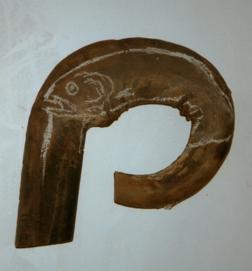 |
I have roughly drawn the trout on the horn in chalk, but if you wish to have the image for a longer period the indelible felt tip pen works. I am not an artist and by using chalk I can remove the wrong lines easily. The end of the horn now needs cutting off just below the fish's tail; this can be done with a hacksaw, coping saw or bandsaw. |
|
|
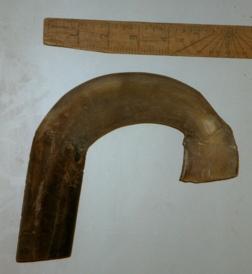
The horn has been removed and one can see the white pith in the centre of the horn; this is softer than the horn and needs to be removed by heating and squeezing. |
|
|
The horn must be heated all around the tail area and squeezed in the vice. Again it may take several attempts to flatten it depending on the thickness of the horn and the pith. Care must be taken when squeezing not to allow the tail to twist too much out of line. |
|
|
The next step is to get the inside line of the handle, whihc in this case is the belly of the fish. I achieve this by using a ten inch half round file. For maximum removal of horn I use a dreadnought file; it is better than a rasp and it does not make grooves. Using a large file does tend to ensure the curve is regular and smooth. |
 |
I have now worked the top line of the fish down, remembering to leave a little bit of horn above the tail to carve the pelvic fin. By laying the head down the way I want it to look on the finished stick I find that I have committed the mistake I mentioned above and not squeezed it enough to make the fish at less of an angle to the shank part of the head. |
 |
I have heated the horn very gently, (but still to the required temperature to achieve the compression of that part of the horn,) around in the angle where the bottom of the fish joins the shank part of the horn and squeezed it in the sash cramp as before. The difference in alignment compared to the above picture can easily be seen. It is very easy to burn the horn at this stage and there is very little horn left to remove to eliminate the burning. |