
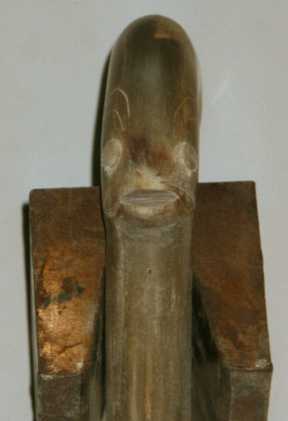
The next stage is, I think the most exciting but also the most difficult to get right - the placing and inserting the eyes. In the early days I used to drill a very small hole and put pins in to establish that I had them positioned correctly. Now I drill the hole the size I want, the size depending upon the size and type of fish.
 |
The hole has been drilled. I fasten the head by the joining rod in the vice facing forward then standing to one side I drill the hole at right angles to the plane of the fishes body at this point. I then move to the same position on the opposite side of the fish and repeat the procedure. By felling the position of the drill on my chest it helps to get both eyes correctly aligned. |
 |
The dowel for the eye can be made from any scrap piece of horn. The piece that was cut off under the chin would do. I like to put the eyes in this way because using the end grain of the horn gives that watery look that fish eyes have. Whilst I make the eyes a tight fit I usually secure them with thin super glue. |
 |
When both eyes have been fitted file them down to about one sixteenth of an inch above the body. Then take a piece of brass tubing that is about a third of the diameter of the eye, drill a hole in the centre of the eye and fit it, using super glue to secure it. Then take a piece of black horn, buffalo is these easiest to obtain and fill the centre of the tube. |
 |
Using a small round file slowly remove the edges from the eye until the centre is slightly proud of the body. One can also make a slight depression around the eyes, in front of the gills and at the front of the fins. Don't overdo it, the stick must feel comfortable in the hand, with no sharp areas to cause blisters |
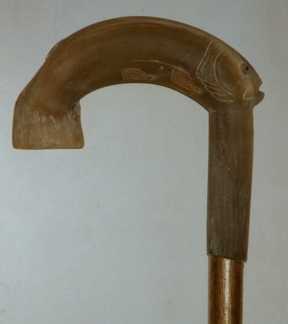 |
The head can now be glued onto the shank, if the fit is tight drill a small hole in the shank at right angles to the bottom of hole drill for the joining rod; this will allow for excess glue to escape. Before the glue is set make a final check that the head and the shank are correctly aligned. There is nothing worse than a stick where the handle goes off at an angle to the shank. |
 |
The marriage of the handle to the shank should have as fine a glue line as it is possible to get. When doing the final working down of the head at the marriage wrap the shank with insulating tape to help to protect it from damage from the files and glasspaper. |