
The development
of a "Bobblehead" carving project was first inspired
as a gift for Ol' Don Burgdorf, as a thank you 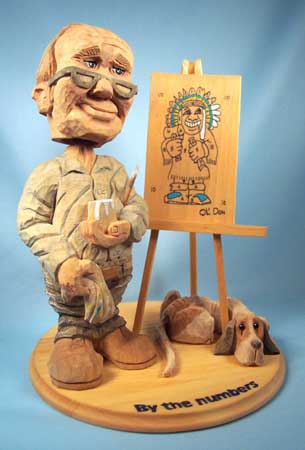 for
some much needed help with a carving pattern he so unselfishly
provided and his innumerable contributions to the woodcarving
community. The resulting bobblehead titled "By the Numbers"
was created from one of his patterns and presented to Don. He
has shared it on the PictureTrail website. Side Note: Ol' Don
is an accomplished artist, so the idea of him painting anything
by the numbers is ridiculous.
for
some much needed help with a carving pattern he so unselfishly
provided and his innumerable contributions to the woodcarving
community. The resulting bobblehead titled "By the Numbers"
was created from one of his patterns and presented to Don. He
has shared it on the PictureTrail website. Side Note: Ol' Don
is an accomplished artist, so the idea of him painting anything
by the numbers is ridiculous.
At the 2003 CCA National Caricature Carving Competition, held at Dollywood in Pigeon Forge, Tennessee, I had the pleasure of meeting Matt Kelley and expressing my appreciation for all the information he provides, and the work he does for woodcarvers worldwide. At a subsequent encounter at the 2003 Artistry in Wood show in Dayton, Ohio, Matt asked if I would provide an insight into the creation of a "Bobblehead" as an article for Woodcarver Online Magazine.
In choosing a subject for this article, we discovered that we were both stalwart supporters of rival football programs (I suspect Matt's support may be derived from prolonged exposure to cold temperatures and too much snow), and a small wager was initiated. The resulting outcome of an upcoming game would determine if the bobblehead I would be carving for this article would reflect the likeness of Ohio State head football coach Jim Tressel or Michigan head football coach Lloyd Carr.
Much to my chagrin, the subject of this article is a bobblehead with the likeness of Coach Carr. Since I am not one to welch on a bet, the likeness of my choosing was selected from an AP photograph of Coach Carr on September 20, 2003 just after shaking hands with Mike Bellotti, Coach of the Oregon Ducks, after a hard fought 31-27 Michigan loss. Perhaps this likeness is not the most flattering one I could have chosen, but from a Buckeye fans perspective it was perfect.
My presentation will not be a detailed step-by-step
description, but rather an overview with accompanying photographs,
highlighting aspects of the project and perhaps providing a bit
of inspiration, resulting in the creation of your own unique bobblehead.
 The project begins with the selection
of a subject, unfortunately premeditated, in this case. Next pattern
development (my nemeses) follows for the complete figure. Once
the pattern is drawn, the head portion only is enlarged to 125%.
(Personal side note on pattern development): Since my career in
engineering drafting did not equate to drawing freehand carving
patterns, I usually try to adapt/alter an existing pattern and
enlist the help of an artistic co-worker to sketch the corrections
needed to provide a starting point for my project. The dimensions
referred to are the ones used for this project only, although
they will probably suffice for any bobblehead of similar size.
Basswood is used for not only this project, but for any other
project I do as well. Carving hardwood was attempted once and
that permanently cured my desire of wanting to carve anything
other than basswood. The grain direction is from head to toe.
The project begins with the selection
of a subject, unfortunately premeditated, in this case. Next pattern
development (my nemeses) follows for the complete figure. Once
the pattern is drawn, the head portion only is enlarged to 125%.
(Personal side note on pattern development): Since my career in
engineering drafting did not equate to drawing freehand carving
patterns, I usually try to adapt/alter an existing pattern and
enlist the help of an artistic co-worker to sketch the corrections
needed to provide a starting point for my project. The dimensions
referred to are the ones used for this project only, although
they will probably suffice for any bobblehead of similar size.
Basswood is used for not only this project, but for any other
project I do as well. Carving hardwood was attempted once and
that permanently cured my desire of wanting to carve anything
other than basswood. The grain direction is from head to toe.

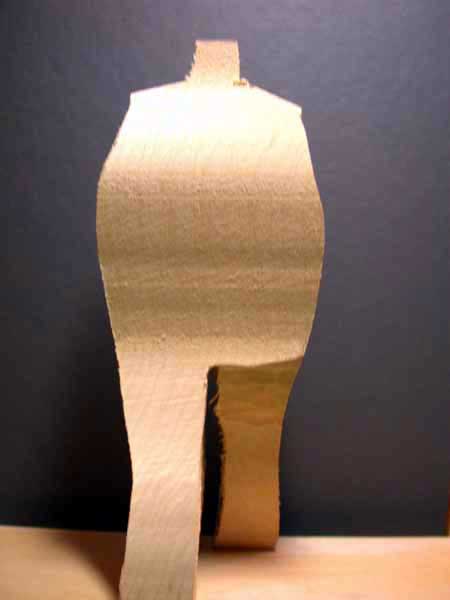
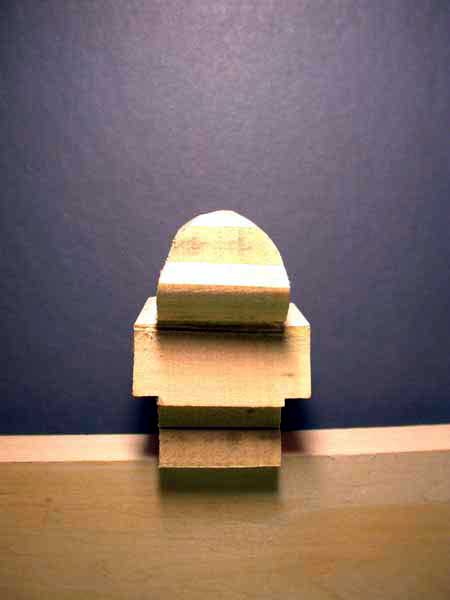
Transfer the patterns to the wood and band saw the pattern out as much as possible from first the front and then the side view, resulting in the pictured blanks.


The head is then hollowed out by drilling to a depth of 1-1/8" and a length of 1-1/8" with a 5/8" square mortise bit (see photo). The resulting hole in the bottom of the head is 5/8" wide x 1-1/8" long x 1-1/8" deep. A round hole is then drilled-centered in the bottom of the mortise with a forester bit to a depth of 1/4" to 1/2". You may want to take a look at the sketch as this sounds a little more complicated than it is.


The usual suspects were used in roughing out the band sawed blanks: knives, chisels, gouges, v-tools, the kitchen sink, or whatever else you need to use. Some intermittent steps are pictured leading to the resulting body with the 5/8" total length and 1/2" diameter elongated neck for spring attachment and the head showing my attempt to capture the desired expression.


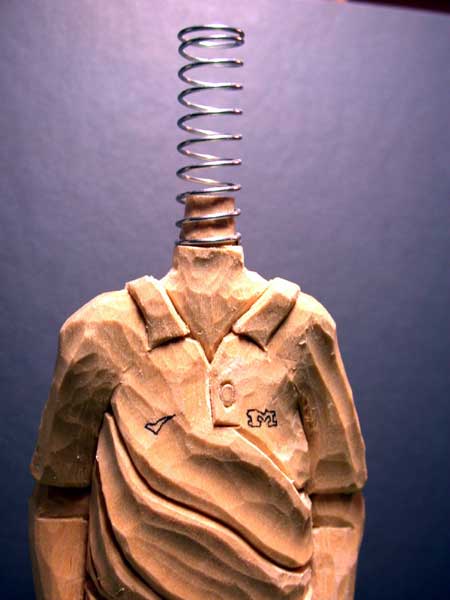

Upon completion of the carving work, test fit the spring to see if there is adequate clearance for the bobble action, keeping in mind the spring needs to be concealed within the head. The compression spring I used was a 1/2" diameter x 1-1/2" long x .041" wire diameter rated at 6.84 lbs. The springs are available from The Woodcraft Shop. A 4-pack of 1-1/2" x 1/2" Bobblehead Springs, ordering number 616141 is available for $3.95. You may order by calling 1-800-397-2278. Small adjustments may have to be made to the slot depth or neck diameter to arrive at the desired bobble action. Dimensions provided are recommendations to get you close to the desired end product.


To finish the carving, my technique involves
wetting the carving, lightly spraying the carving with a product
called "Simple Green" and scrubbing it with a denture
brush. Lightly rinse (do not soak) the carving and remove excess
water from the carving by blotting with an all white paper towel,
then start painting while the carving is still damp. For painting,
I use Delta Cremacoat paints thinned with water to a wash consistency.
When painting is completed and the figure is completely dry, a
mixture of linseed oil and oil paint is used to antique the carving.
After the figure dries (about three days) I use a two-part epoxy
to glue the spring in the hole at the top of the slot inside the
head, then to the neck. After a 24 hour cure of the epoxy, it's
time to mount the figure to the base of your choice. My unique
keepsake will now agree with anything I say by just merely pressing
the chin down a little. This project is appropriately titled
"The Agony of Defeat"

