
Have you noticed yet that woodcarvers are, on the whole,
a friendly and open group? In general, we're
a pretty sociable bunch, willing to share our woodcarving experiences
and knowledge with anyone who asks... sometimes even if they don't
ask... sometimes whether they are interested in woodcarving or
not... sometimes to the point that co-workers find alternate routes
so they don't pass by your cubicle... but I digress. This
ready sharing of knowledge was drastically contrasted when
I researched violin making a couple years back. There
are some good sources out there for making violins, but it's still
a dark and secret society compared to what I'm used to in woodcarving
circles. I have been fortunate in my woodcarving travels
to have been exposed to a large number of wonderful and
talented woodcarvers. Some of these folks are well known...
some should be. Almost without exception, they are willing
to share with you what they know, sometimes just for the asking.
Their work keeps me humble at the same time that their teachings
give me hope to carve better.
One common denominator that I have noticed
with the woodcarvers who have the most original, "gee whiz"
carvings is that they use modeling of some kind in the creation
process. This modeling can be a series of drawings using
pencil and paper or computer drawing programs. It can be
paper dolls or pipe cleaner figures. Or it can full, in-the-round
clay sculptures built on wire skeletons called armatures.
Personally, my more successful carvings have usually been the
result of the last form. What follows is not a really a
good step-by-step, but more like a story board of the modeling
I did for a recent project.
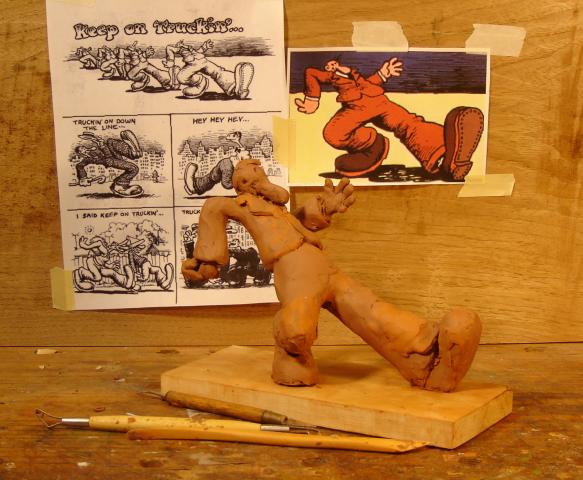
For quite a while I've signed my woodcarving
e-mails with "Keep on Carvin'". It's a spin off
of the "Keep on Truckin'" motto from the 60's.
A motto which came with a fairly infamous character of the late
60's by cartoonist Robert Crumb who also drew Mr. Natural
and Fritz the Cat. It's been a project banging around in
the back of my head to carve a woodcarver version of him.
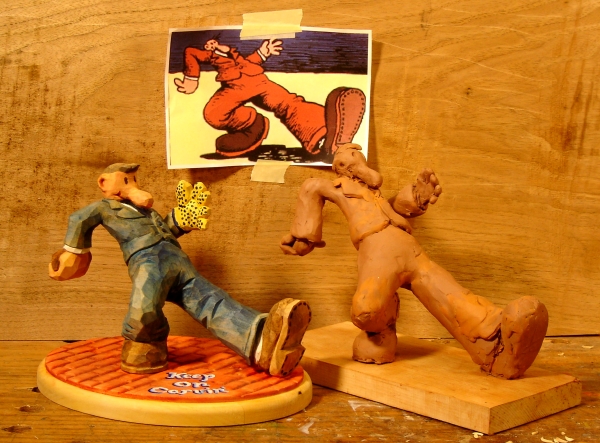
So, a little Google Images research and I found useful versions
of Crumb's Truckin' Guy: HERE and HERE. (New window will open; close 'em
to come back here.)
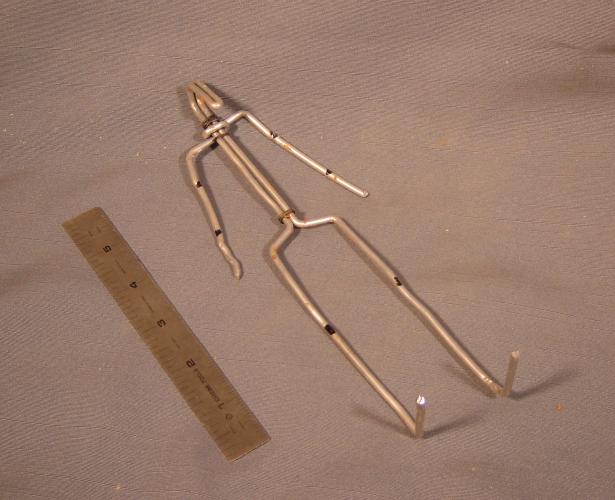
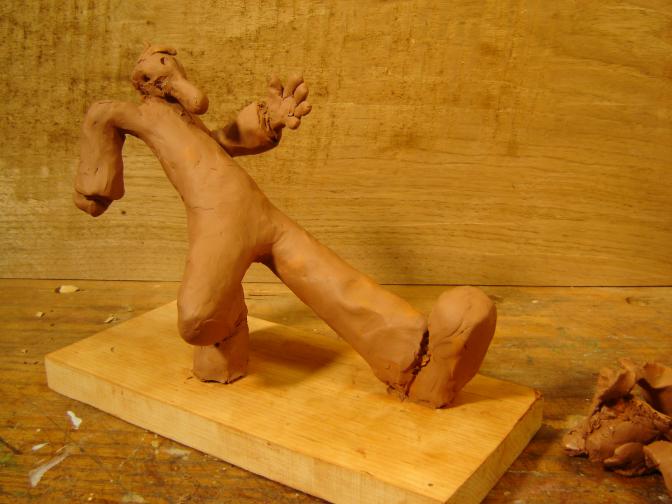
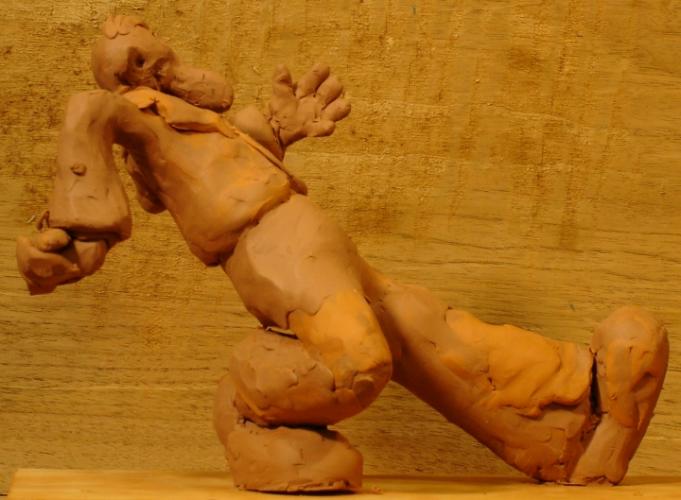
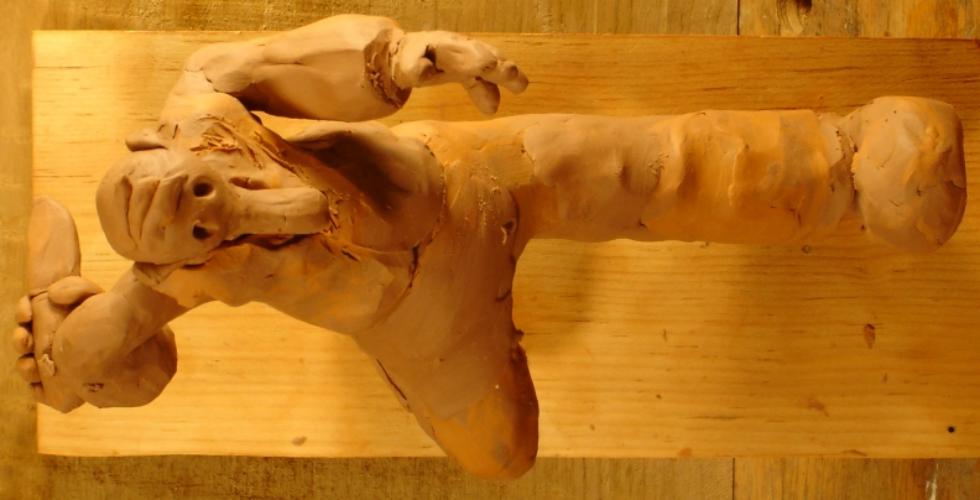
Carving a cartoon in three dimensions is sometimes a challenge because the cartoon is uniquely distorted and normally drawn in a limited range of angles. My sketches for imagining what a side view and top view of this dude did not help my confidence level, so I resorted to the "big guns" and did a clay model. Notice that I assemble the skeleton (armature) in what I call a "dead man" pose, making sure both arms and leg lengths are equal, right to left. The bending points (shoulders, elbows, knees, etc.) are marked with a permanent markers. Notice their locations are distorted based on the original drawings, but still equal right to left. During the posing of this figure all bending occurs at these points, never between. They keep you honest.
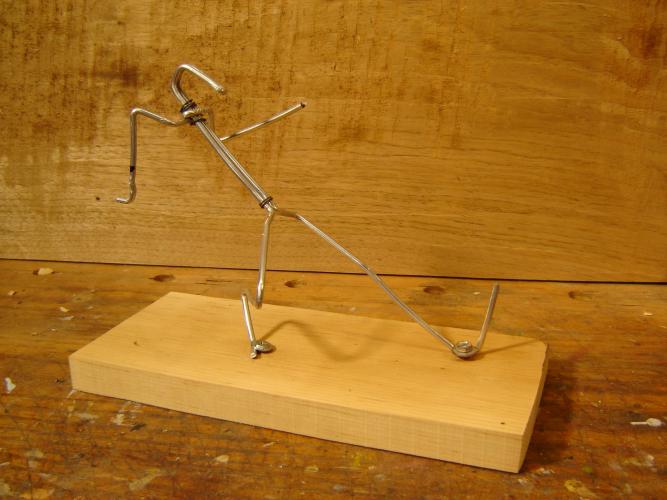
Here the figure is posed and anchored to
a based with screws. Sometimes I purposely leave extra wire
on the feet to create loops for these screws to pass through.
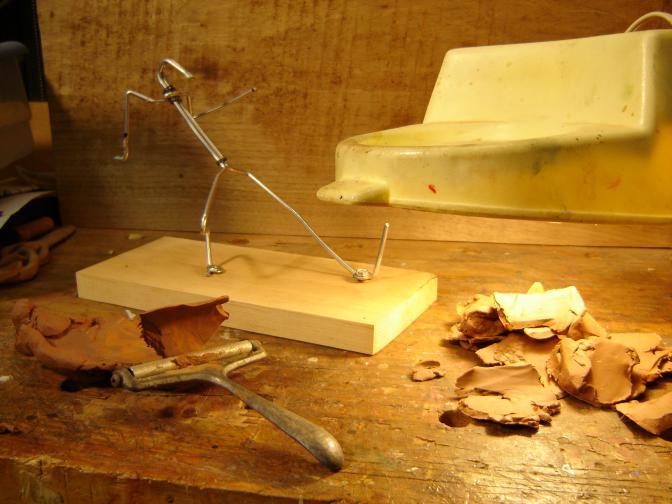
Now we start to flesh out the model with clay.
I use a petroleum based, non hardening clay called plastelina.
There are other brands, but this is the one that I have access
to at my local art supply. Clays that you can harden in
the oven, such as Fimo, work as well, but aren't as reusable.
Plastelina has the disadvantage of not being as workable at lower
temperatures, like my basement shop in January. That's why
you see a pile of slabs (cut with a wire cheese cutter) under
my 40 watt magnifier lamp. Obviously 100 watts works much
better.

Hmmm... still a little on the thin side.
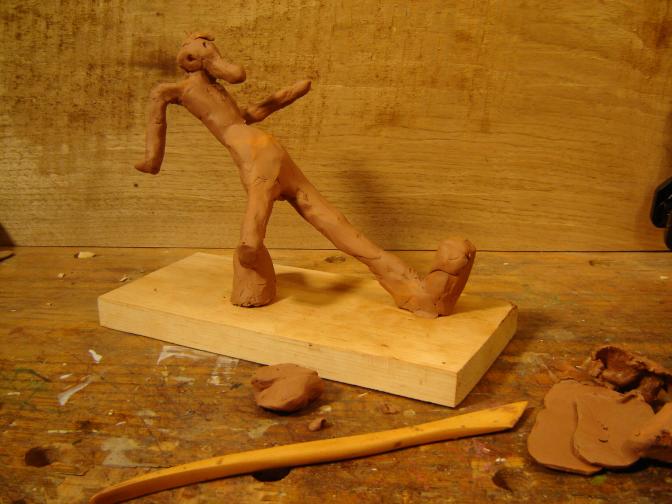
Now for a jacket and tie.
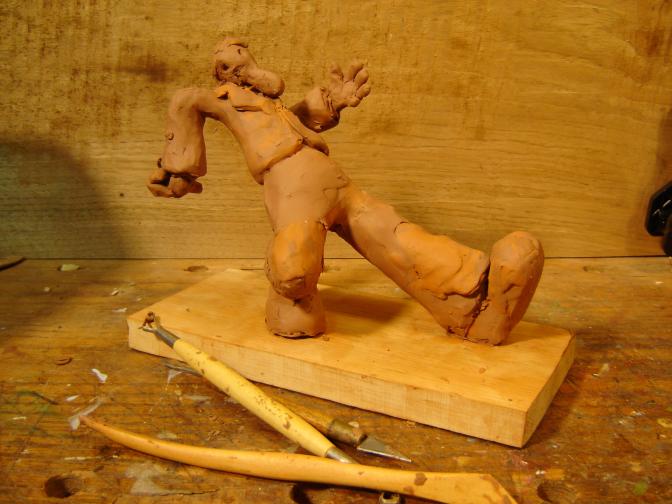
And I think we're finished.
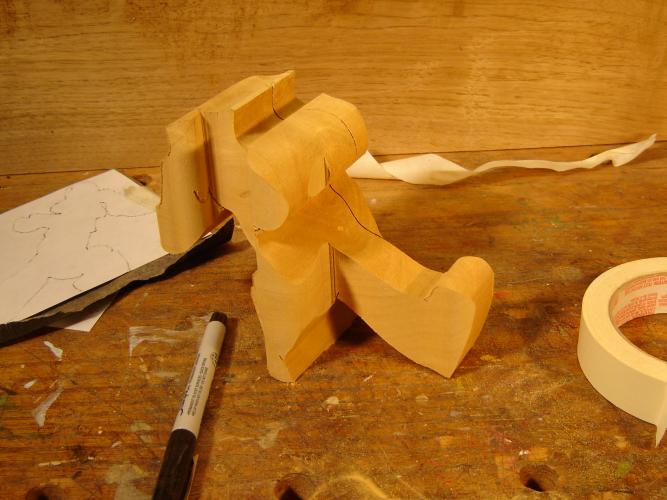
Now for pictures to use for our cutting pattern.
I set up my digital camara on a tripod and shot from as far back
as I can with zoom. This removes the distortion that a close,
wide angle shot produces. Don't worry about high resolution
here, this isn't a "wall hanger". We just want
enough quality to get an accurate outline for cutting on the band
saw.
Scale the pictures up or down (the same amount)
to suite the size of your block of wood. In the picture
mine are taped to the wood with a sheet of graphite paper under
each side. You could print this to card stock or acetate
and cut out a pattern profile with an x-acto knife. Then
trace the pattern on the wood with a Sharpie type permanent marker.

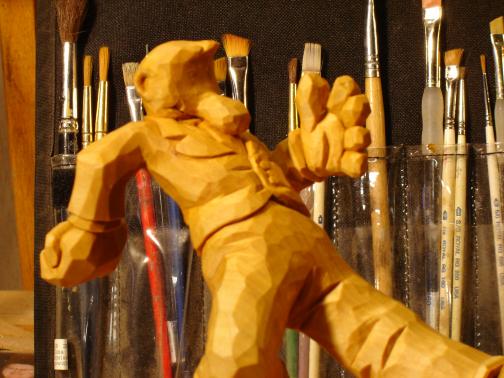
And here's the cut out blank. This still
didn't look like much to me, and I was glad to have the clay model
for reference during the early stages of the carving work.
Remember the sculptor's story about? "You carve an
elephant by cutting away everything that doesn't look like an
elephant"? This is most true at this stage, and the
clay model helps a great deal. For instance, that lump that
resulted from cutting around the left hand... everything to the
right of the hand and above his chest can go. If I
can clamp him down, a mallet and large chisel will make quick
work of that.
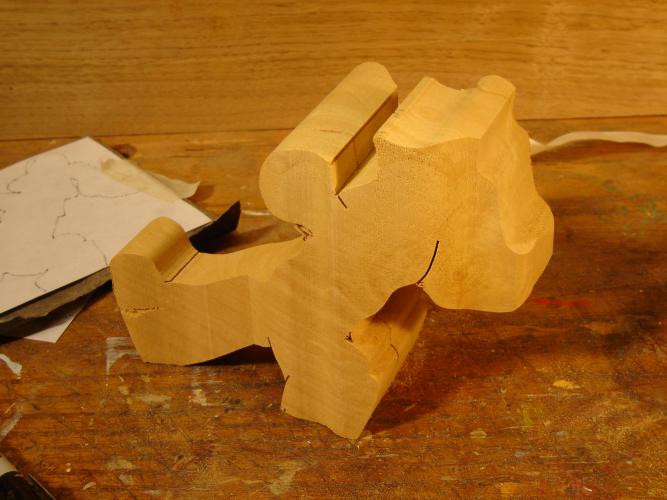
.. . . and after elves have carved it for me <G>.
Not too bad, but they dropped that back elbow. Noticed I
left extra wood on the left hand and exaggerated the glove.
The original model is in clay, but it's not "in stone".
Alterations are always permitted as long as there's wood left.
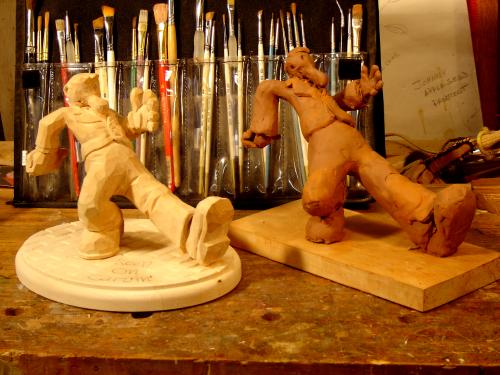
With a coat of boiled linseed oil and raw sienna artist oil for
color.
Painted with tints made from boiled linseed oil and artist's oils.
MinWax Natural (clear) stain can be used in place of the boiled
linseed oil. It will dry faster, but sometimes dries to
glossy for my taste.
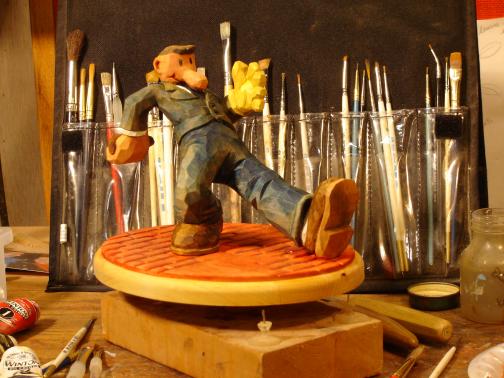
Not too shabby for an amateur, I guess.
Keep on Carvin'
-Mike Bloomquist->
 Mike Bloomquist is a carver
and carving teacher, and a regular contributor to WOM.
Mike Bloomquist is a carver
and carving teacher, and a regular contributor to WOM.
You may visit Mike's web site, Wooden Dreams Woodcarving HERE or email him at m.bloomquistATverizonDOTnet.