
After squeezing the core hole and cutting the shank side of the horn, one is able to get a better idea of where the horn should be squeezed to bring it to the correct shape. For this I use the paint stripper for heating the horn and a sash cramp to apply the pressure. I am unable to give the correct degree of heating to be applied, but I was taught that it should be sufficiently hot that one could touch the horn but not be able to hold it. The man who told me this, however, has hard hands after a lifetime of manual work so I am afraid this is something that comes with experience.
 |
I have marked in chalk the area that I want to heat on the horn. Both sides of the horn should be heated and whilst the heat will radiate out from this area as long as the heat is directed at the marked area this will not cause any problem. |
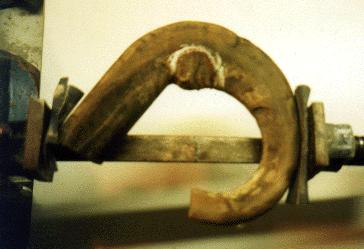 |
This is that particular part of the horn squeezed up and the bulge can be seen where the heated part of the horn has distorted with the pressure. Notice that there is no distortion on any other part of the horn and no cracks on the back of the horn that would have occurred if the horn had been heated in the wrong place or heated insufficiently. |
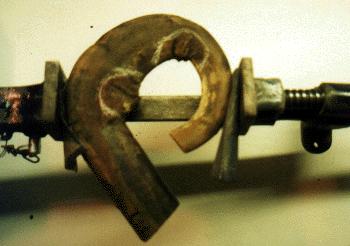 |
This shows the second area of heating and compressing and the differences in the shape of the horn in these three pictures can be seen. Each time the horn is squeezed it must be allowed to cool down before being removed from the cramp. Notice the pieces of glasspaper between the jaws and the horn to stop it slipping when providing the pressure. |