Archive for September 2013

September/October 2013 WOM

Vol17Issue5Banner

Wel­come to the September/October ’13 issue of Wood­carv­er Online Magazine

Our Front Page pho­to this issue is:

Lama Table

Carved by Sam­pa Lhundup

Lama table 82

Hel­lo, Friends in Carving -

Sum­mer is over and the signs of Fall are start­ing to show in North Amer­i­ca.  One sure sign of fall is that we are just a few months away from Artistry in Wood, the annu­al two day carv­ing show host­ed by the Day­ton Carvers Guild.   It’s a great show, and one that should be on your cal­en­dar to attend.  Look for our cov­er­age of the 2012 AIW win­ners lat­er in this issue.

In this issue -

Avail­able now:

Pro­file: Sam­pa Lhundup

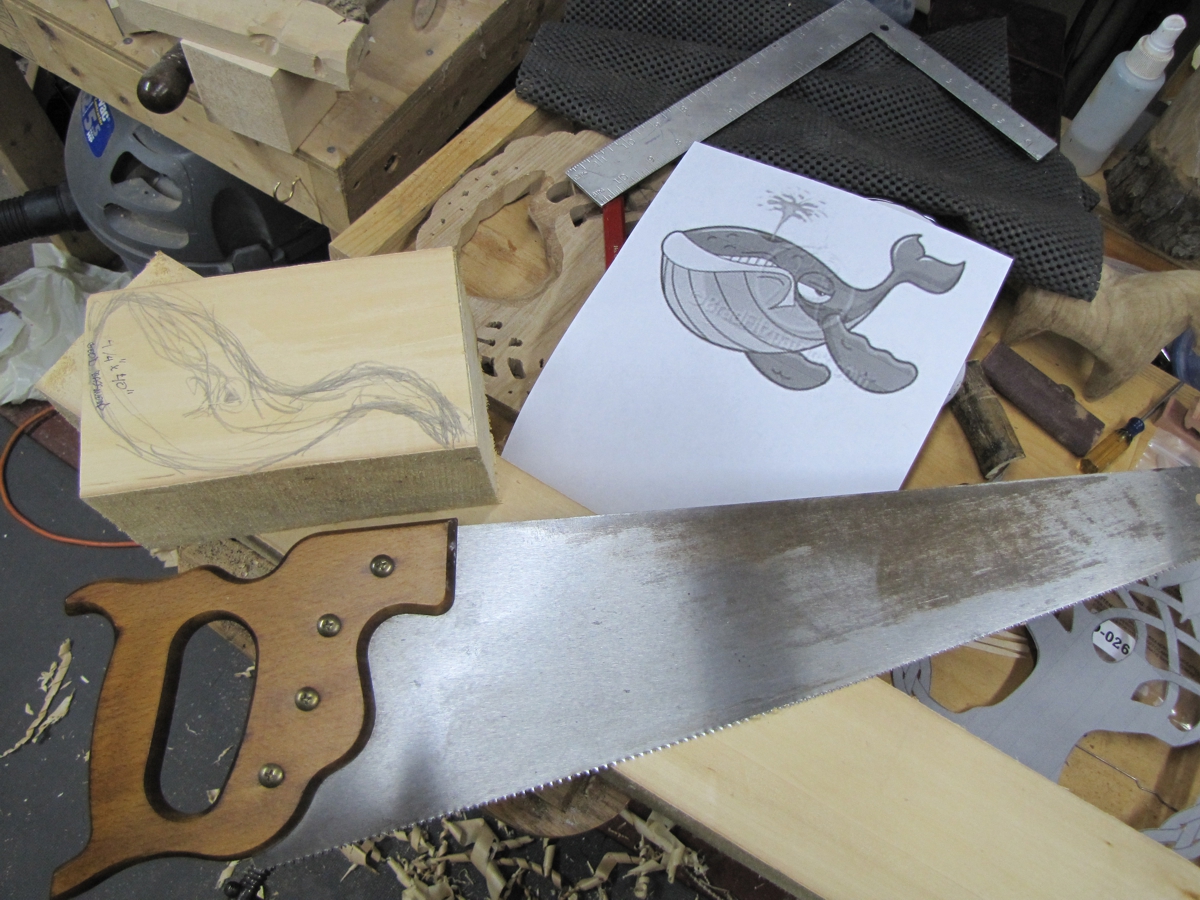
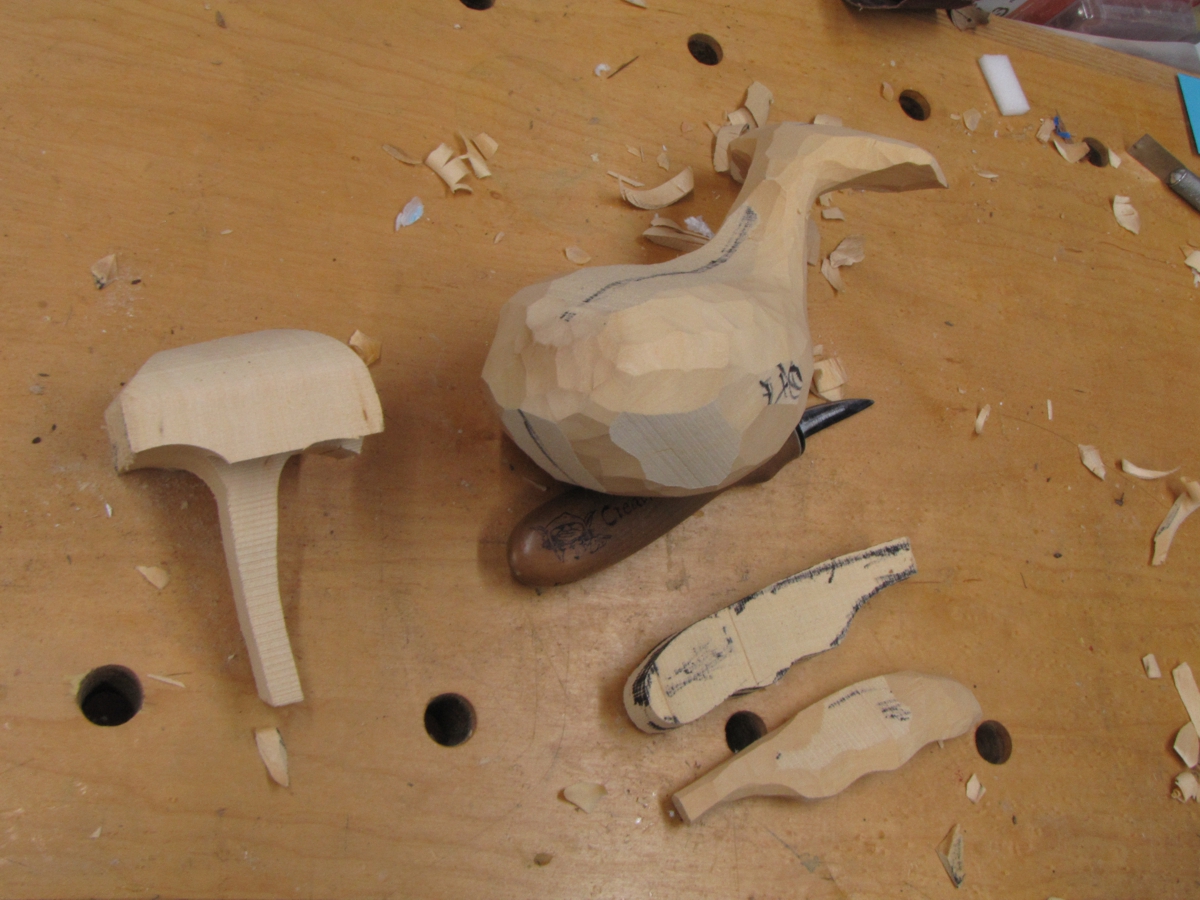
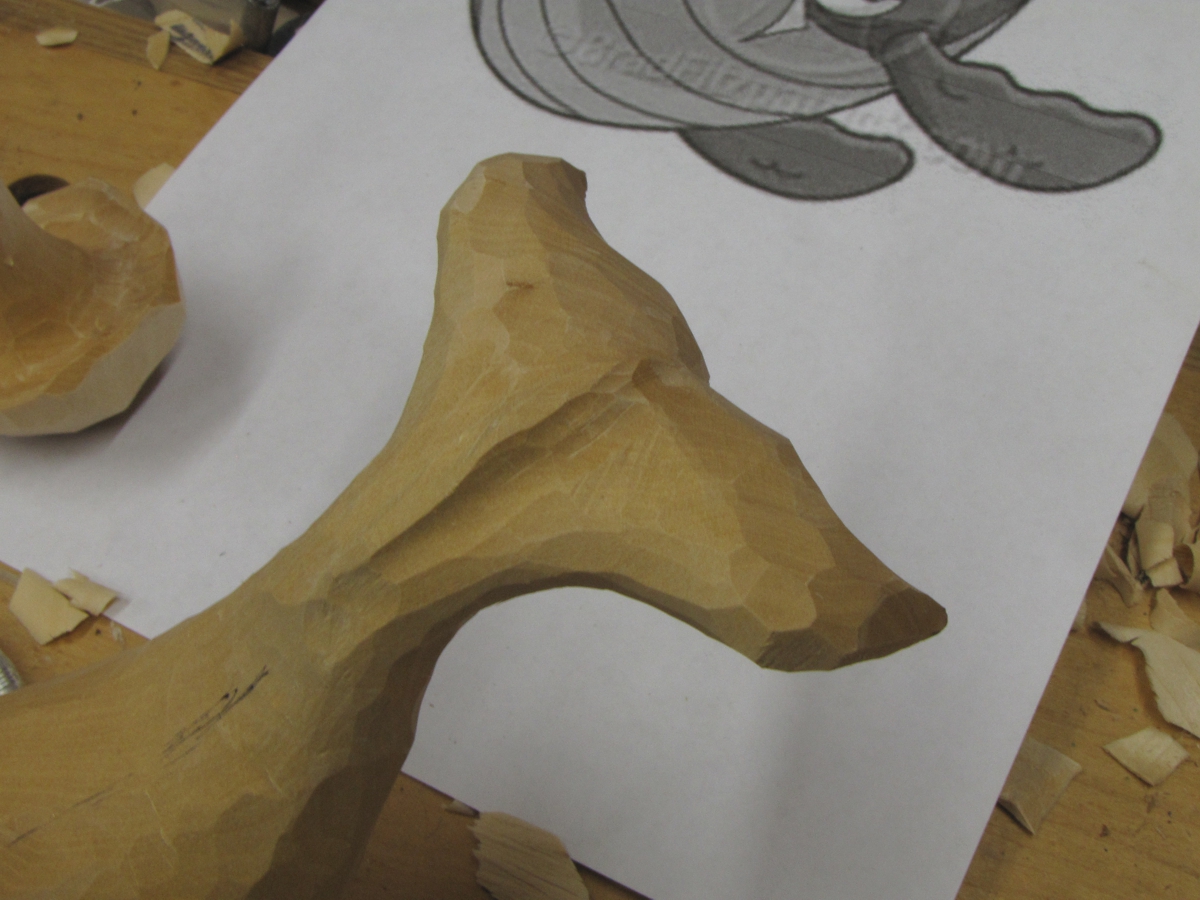
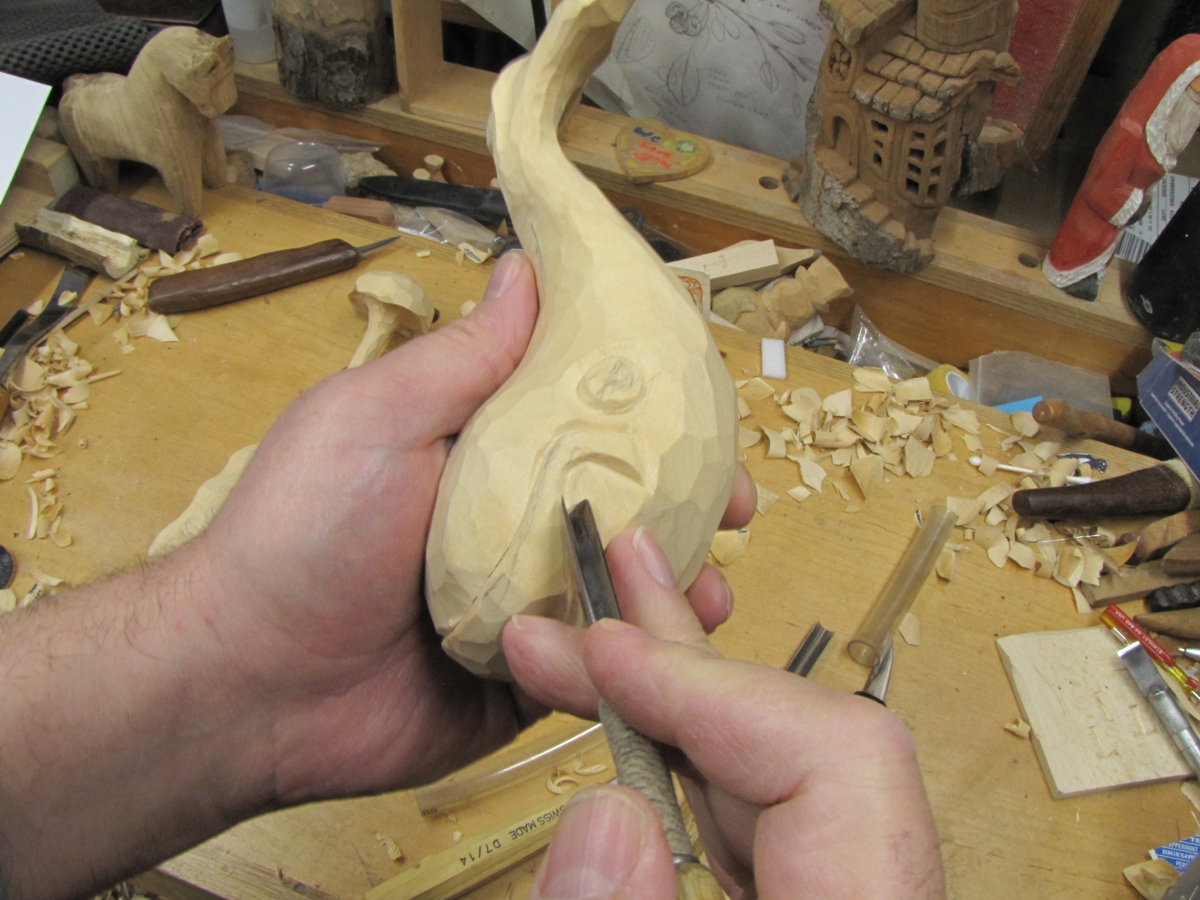
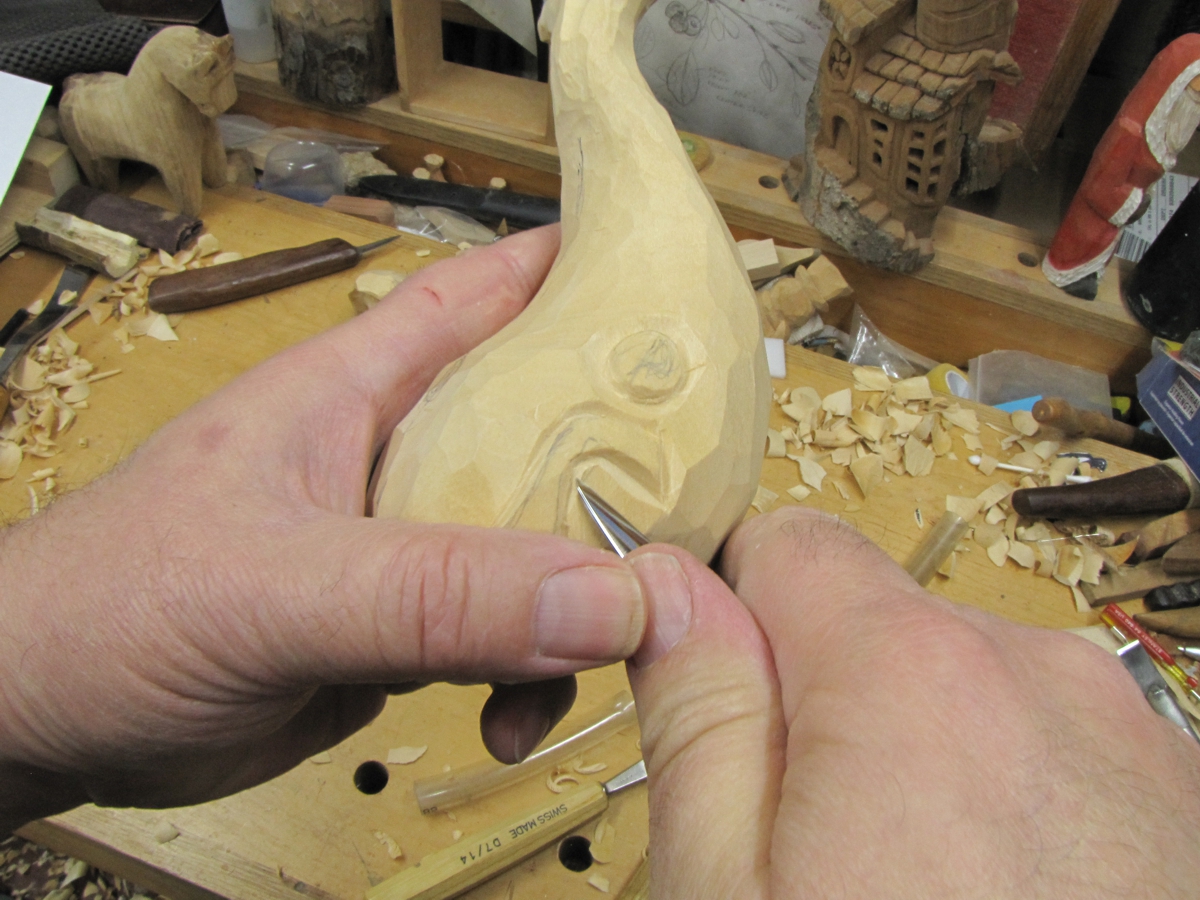
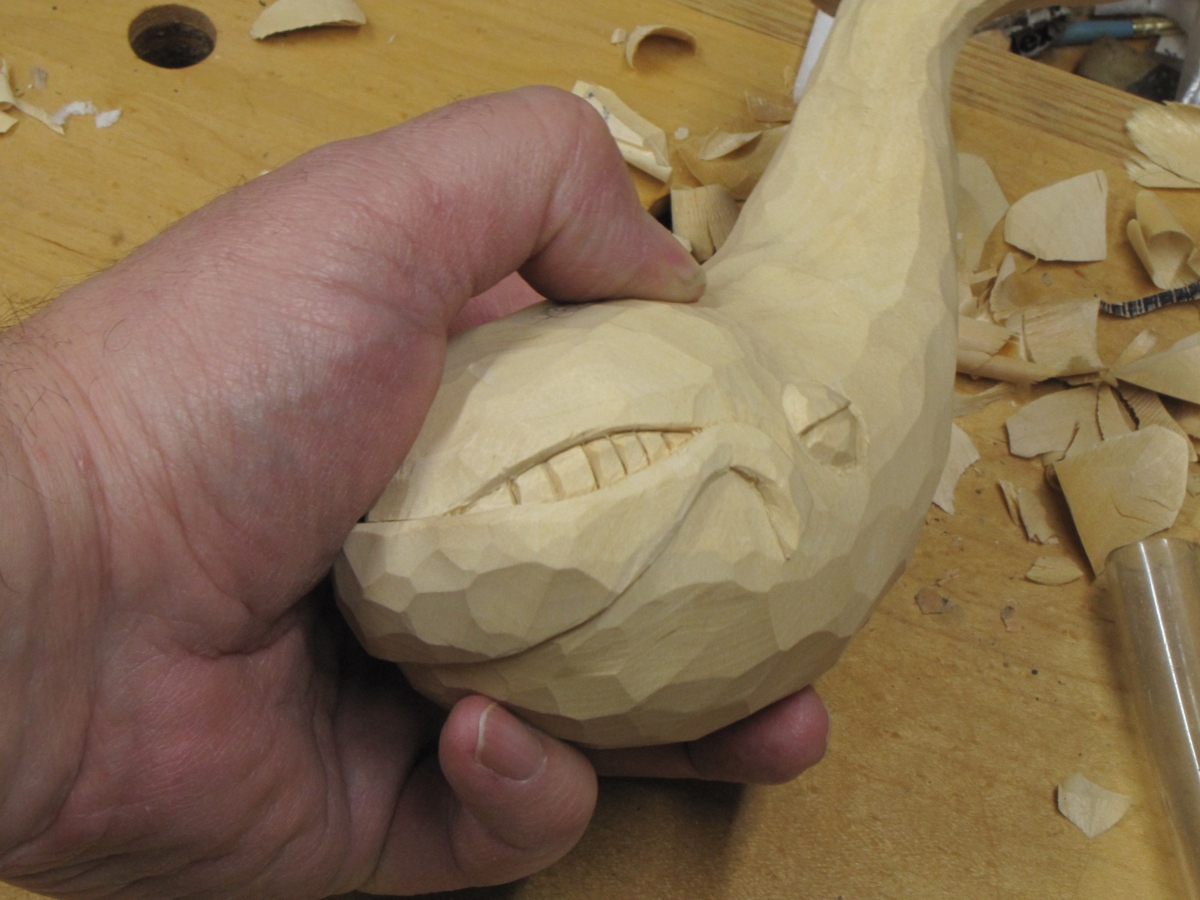
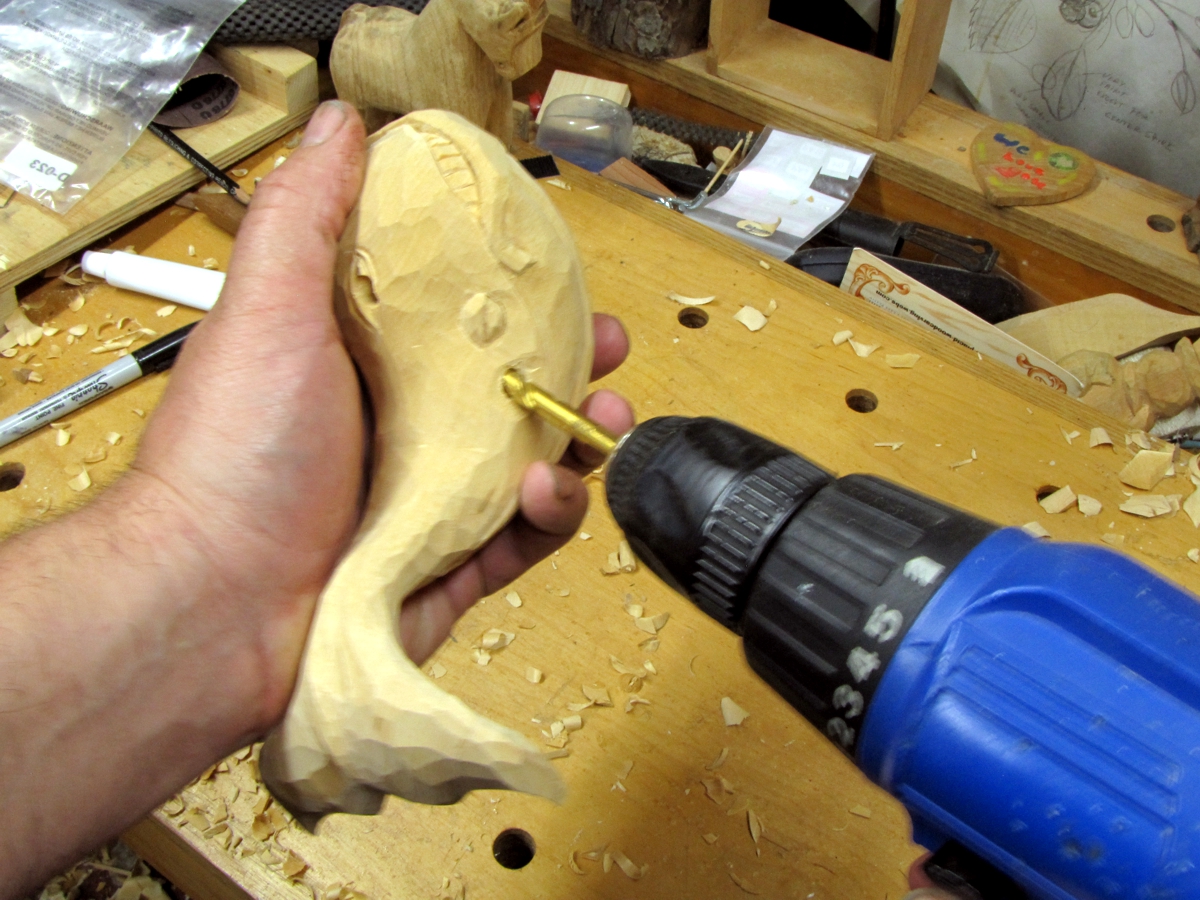
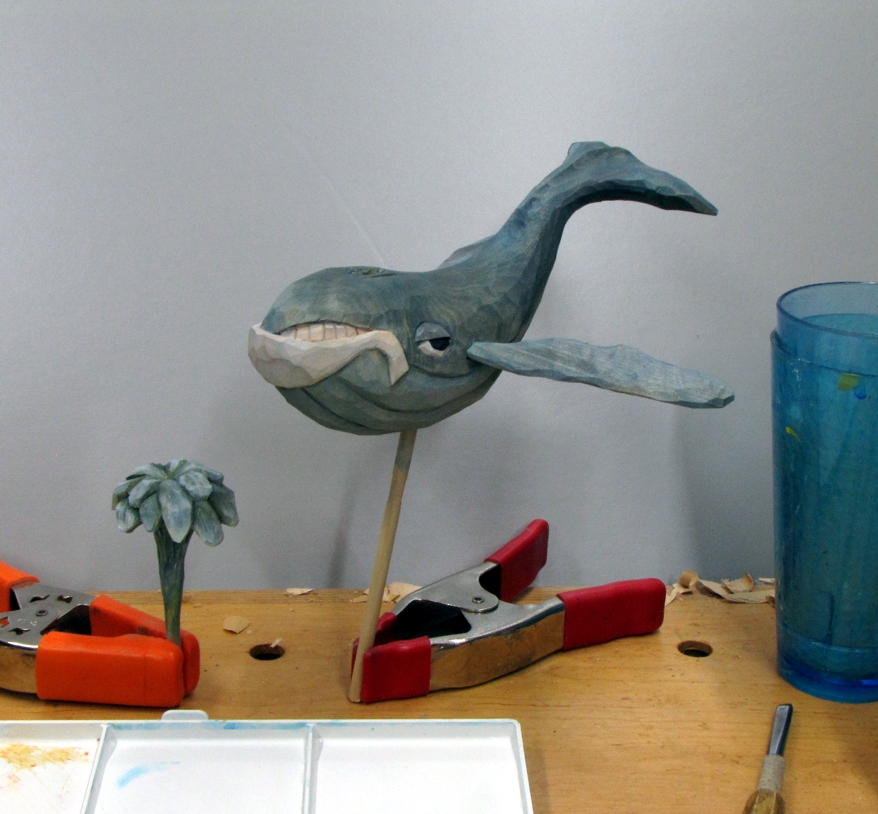
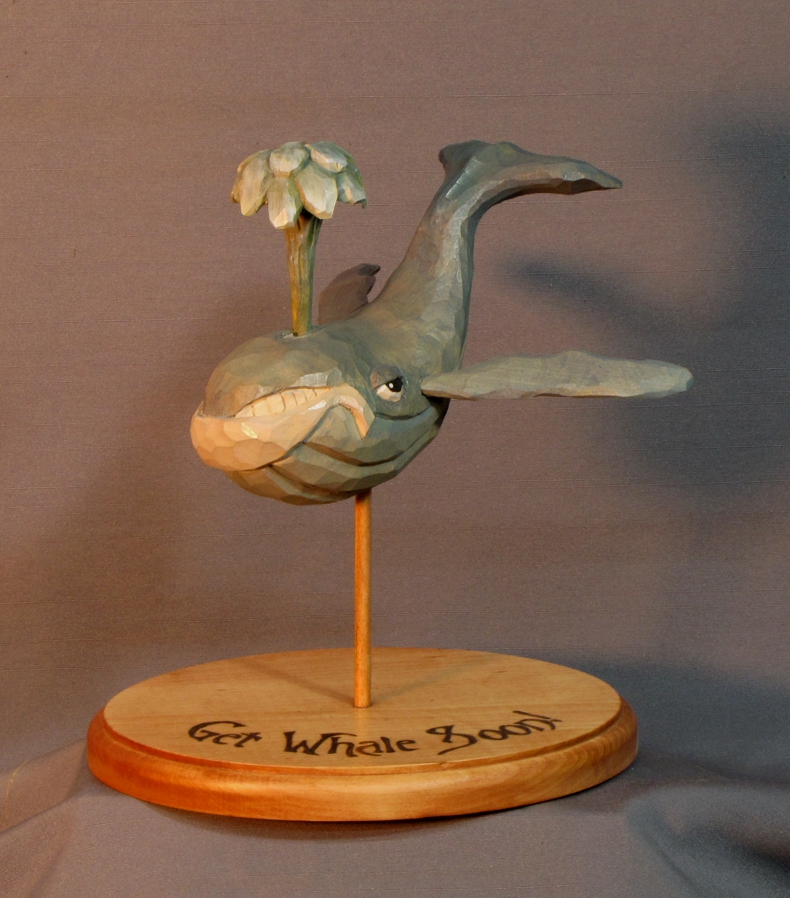
Mike Bloomquist: Get Whale Soon!

Ol’ Don’s Draw­ing Table:  NFL Gnome

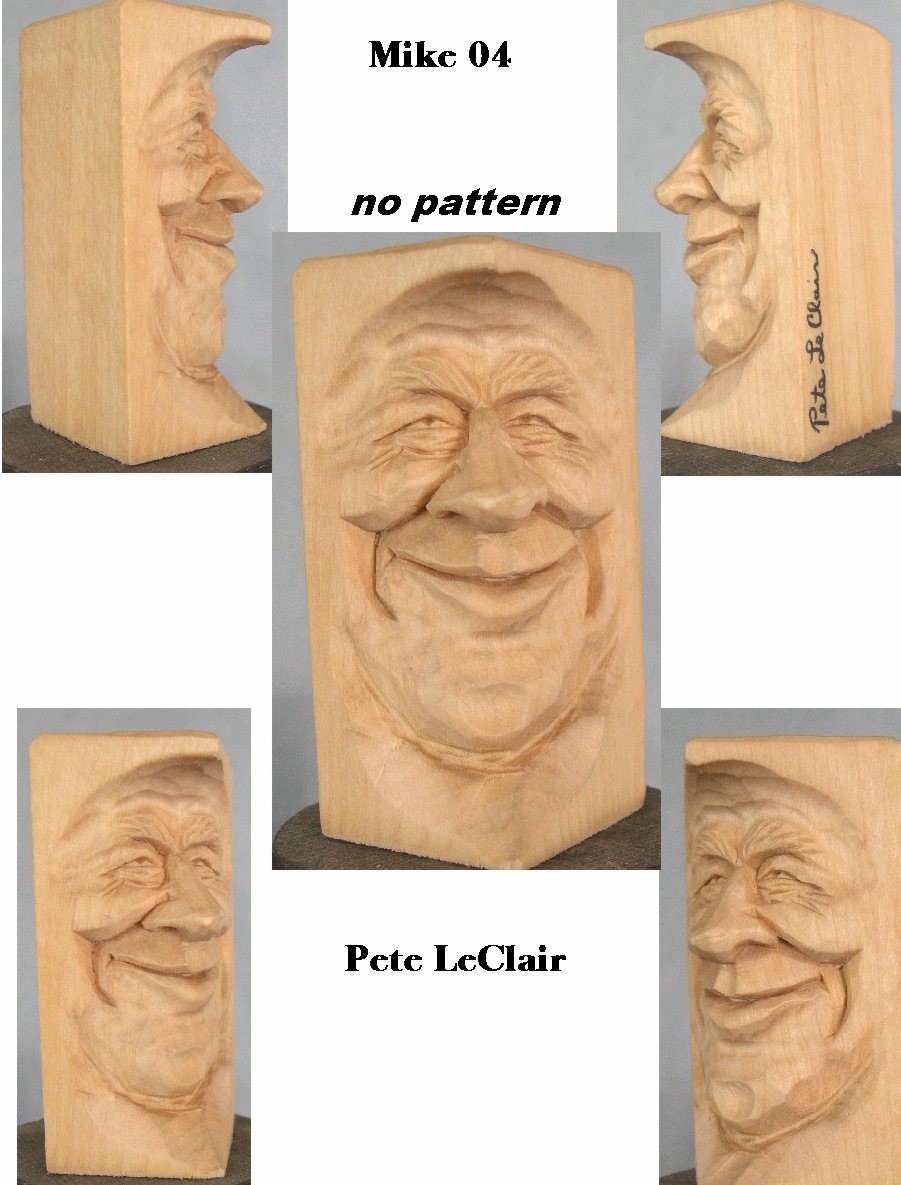
Pete LeClair: Mike 4

Call for Pho­tos:  Annu­al San­ta Gallery

Com­ing soon

Call for Pho­tos: Celtic Art Gallery

Win­ners Gallery:  Artistry in Wood 2012

Pho­to Gallery:  Gath­er­ing of Wood­carvers Reunion ’13

Pho­to Gallery:  2013 Husky Cup

Enjoy!

WOM Editor Matt Kelley

WOM Edi­tor Matt Kelley


Matt Kel­ley

Editor/Owner


Carver Profile: Sampa Lhundup

Sampa LhundupWho: Sampa Lhundup

Home­town: Nagchu Coun­ty, Tibet; cur­rent­ly liv­ing in Rochester, NY

Carv­ing Styles:  Intri­cate­ly carved reli­gious objects in the Tibetan tra­di­tion, as well as freeform sculp­tures and objects

Train­ing: 

  • Third gen­er­a­tion mas­ter wood­carv­er (his grand­fa­ther’s work can still be found in the Pota­la in Lhasa)
  • Six years of train­ing (study and appren­tice­ship) through the Shachun Wood­craft Cen­ter affil­i­at­ed with the Tibetan Gov­ern­ment in Exile in India.

Pro­fes­sion­al Experience:

  • Served as a mas­ter in res­i­dence at Markham Tibetan Tra­di­tion­al Wood­carv­ing Insti­tute Estab­lished a stu­dio in Dharam­sala where he employed up to 20 wood arti­sans and stu­dents to help with his commissions.
  • Client list includ­ed H. H. the Dalai Lama and many well-known Tibetan lamas.
  • Cur­rent­ly carves in a shop in Rochester, NY and sells his art work through word of mouth in the Bud­dhist com­mu­ni­ty or via his web­site at  www.TibetanWoodcarver.com

His­to­ry:  Born into a nomadic fam­i­ly, Lhundup lived in a tra­di­tion­al yak hair tent as a boy.  Lat­er, as a young man, he was jailed and tor­tured by the Chi­nese and lat­er escaped to India over the moun­tains at great per­son­al per­il.  In India he met a Tibetan woman and began a family.

In 2011 Lhundup left for the Unit­ed States at the invi­ta­tion of mem­bers of the White Lotus Bud­dhist Cen­ter com­mu­ni­ty.   His fam­i­ly remains in India as his refugee sta­tus has not been final­ized (he has a polit­i­cal asy­lum hear­ing sched­uled for Octo­ber of this year).  He has learned Eng­lish (a work still in progress) and is work­ing to estab­lish him­self as an artist here in the Unit­ed States so he can bring his fam­i­ly to live with him.

To see more of Sampa Lhundup’s work, click HERE

Lama table 82

Get Whale Soon!

They say a pun is the low­est form of humor, so what bet­ter time to inflict one on a friend but when they’re ill.  And if your ill friend is in a sit­u­a­tion where get­ting well is a rel­a­tive thing, excuse your­self as I did and explain that Get Whaler Soon brought to mind a car­i­ca­ture of Ahab with a har­poon… not near­ly as fun or effec­tive as this project is.  Trust me!

OK, let’s get start­ed! If at any time the pic­tures don’t help you with the step, skip ahead for lat­er shots for more ref­er­ences (espe­cial­ly steps 23 & 24).  Also know that click­ing on any pic­ture will enlarge it.  To get back to the tuto­r­i­al, just click the “Back” arrow of your browser.

Step 1:  Well… my step one. Could have sworn I’d seen a “Get Whale Soon” carv­ing project some­where.   Could not find it.  Nor­mal­ly at this point I would try and draw my own pat­tern, but this project/muse had a time crunch on it.  So then you type “car­toon”, “car­i­ca­ture”, and “whale” into Google and search pic­tures.  Nor­mal­ly I take 2–3 of my favorites and com­bine them.  This time, this one just seemed per­fect.  Sketched a quick pro­file.  Notice how the grain goes par­al­lel to the length at the nar­row­est sec­tion of the tail… very important.

get whale soon - 01


Step 2:  Band saw­ing off what I can.  You can’t tell from the pic­ture, but that’s a Rock­well 14″ with a 6″ ris­er block kit.  It’s a vet­er­an that came over from the hob­by shop of a closed US AFB in Ger­many.  The beast has a trans­mis­sion that allows it to cut met­al as well as wood.

get whale soon - 02


Step 3:  Some more band saw cuts.  A lit­tle hard to describe, but the sec­ond set of band saw cuts from the nose to the widest part are down from the tail and the rest were down from the front.  Check the saw marks in the picture.

get whale soon - 03


Step 4:  The fins are going to be carved sep­a­rate.  Try to lay­out the pat­tern so that the grain is par­al­lel to the length of the root where it will be insert­ed into the body of the whale.

get whale soon - 04


Step 5:  And the water­spout is going to be carved sep­a­rate as well.

get whale soon - 05


Step 6:  With most of the parts cut out, start by knockin’ the cor­ners off.  Notice the cen­ter­line I draw to stay symmetrical.
get whale soon - 06


Step 7:  You don’t want to carve the fins flat. Cut them dou­ble thick and carve away the black areas.  Remem­ber to make one side the mir­ror of the oth­er.  Also, there’s a “don’t” in this pic­ture… the end that should insert into the whale’s body should end par­al­lel to the grain.  This means I should have cut this from a thick­er piece of wood and fin­ished that end of the curved fin flat against the side of the wood.

get whale soon - 07


Step 8:  The shape of things so far… the water­spout is basi­cal­ly a mush­room with a tapered stem… the fins taper down to a dow­el rod shape at it’s base for mount­ing in the body (lat­er)… the body is nice­ly round­ed with a soft­ly flat­tened tail.

get whale soon - 09


Step 9:  Some close ups.  Notice that the typ­i­cal cross sec­tion of the main body is not cir­cu­lar.  It’s kind of squashed with the widest point being high of the center.

get whale soon - 11

get whale soon - 10


Step 10:  The ridge from the tail bone.

get whale soon - 13


Step 11:  This shape is done with a gouge cut down both sides of the cen­ter line, and then a knife or shal­low­er gouge is used to blend the out­er sides of each of those cuts into the tail (erase them).

get whale soon - 14


Step 12:  Time to draw the facial fea­tures.  A per­ma­nent pen would have been bet­ter… no smudg­ing of the graphite over the carv­ing, either eras­es with a knife not an eraser.

get whale soon - 15


Step 13:  Out­line the eye and lips(?) with a stop cut using a v‑tool (leaned slight­ly towards the waste side of the cut).

get whale soon - 16


Step 14:  Carve away wood from the waste side of the cut until you no longer see that side of what the v‑tool did.

get whale soon - 17


Step 15:  OK, this is what it looks like after a few more steps.  To get here  I round­ed the eye area then stop cut the lid and the low­er half of the eye cir­cle.  I then removed some wood from the inside of these stop cuts.  I also stop cut the upper lip and the low­er lip where it forms that open area of the mouth where the teeth(?) go. Then I removed wood from inside this area.  Remem­ber this pat­tern is repeat­ed as mir­ror images on both sides of the cen­ter line.

get whale soon - 19


Step 16:  Draw in the teeth (yes, I know they’re not real­ly teeth on the whale, but this is caricature).

get whale soon - 20


Step 17:  Then chip cut out the ver­ti­cal lines and voila!

get whale soon - 21


Step 18:  Drew in the rows of the under­side.  Notice that the depres­sion on the right isn’t as sharp as the one I’m cut­ting.  I soften/widen it on pur­pose by mak­ing two more pass­es on the first cut.  One with the v‑tool leaned over to the left and anoth­er pass leaned to the right.

get whale soon - 22


Step 19:  The water spout so far is a mush­room with a tapered stem.  The final shape is like a flower with long, round tipped petals rolled severe­ly over as they radi­ate.  Stag­ger and over­lap them like shin­gles.  I decid­ed after out­lin­ing them with a v‑tool that they need­ed a cone shaped dip to spray out from and that’s what you see me carv­ing now.

get whale soon - 23


Step 20:  Stop cut the petals with a v‑tool or a knife. Start with the whole shape of the top­most ones and cut waste wood out from the water “petals” below.

get whale soon - 24


Step 21:  You might need to under­cut more from behind the bot­tom edge to “sell it”.  This is prob­a­bly the trick­i­est piece to carve… go slow!

get whale soon - 25


Step 22:  Drill the holes for fins… approx­i­mate­ly 45 degrees back and slight­ly down.  Test fit them and when you like them epoxy them in..

get whale soon - 26


Step 23:  I would drill the hole in the base first (1/4″ hole for a 1/4″ dow­el rod) and then drill the hole in the whale.  When that all looks good, then drill the hole for the water spout.  Notice he looks a bit grumpy here… paint­ing the pupils in will fix that.

get whale soon - 27


Step 24:  …and a view goin’ away.

get whale soon - 28


Step 25:  My secret for lay­ing out let­ter­ing?  Corel Graph­ics Suite X5 stu­dent & home edi­tion.  Corel Draw lets you fit text to a curve. Oh, and I’m a font junkie.  This one is Nach­mere (Night­mare).

get whale soon - 29


Step 26:  Graphite paper, painter’s tape, and an emboss­ing pen (which I use for paint­ing as well… but not emboss­ing… go fig­ure <G>).

get whale soon - 30


Step 27:  My pyrog­ra­phy kit is a Franken­stein mon­ster… Detail Mas­ter base con­trol, an adapter, and Opti­ma pens with inter­change­able tips.  This was a deer foot shad­er.  I’m not an expert, and it might have been eas­i­er to out­line them with a dag­ger point and fill with the shad­er.  Next time.

get whale soon - 31


Step 28:  TaDa! (How’s that for an infor­ma­tive step?)

get whale soon - 32


Step 29:  This is towards the end of the paint­ing.  When I start­ed, I thor­ough­ly soaked the pieces with water using a spray bot­tle and then used very watered down wash­es of col­or.  If you look close you can make out the grain.  That’s just the way I roll when paint­ing my carv­ings, if you have a pre­ferred method of your own use it.

get whale soon - 33


Step 30:  A cou­ple coats of acrylic clear satin… just enough to get rid of the chalk­i­ness of the acrylics and leave the piece with a nice, soft sheen.

get whale soon - 35


Step 31:  An a close up.  Remem­ber when I said I used the emboss­ing tool for paint­ing?  Check out the small dot of off-white high­light­ing the pupil.

get whale soon - 36


I hope you enjoyed the project, and under­stand when I say that I hope you don’t have to carve too many of these.  If you do carve sev­er­al, try a dif­fer­ent whale with a dif­fer­ent shape next time like a sperm whale, or if the patient is a uni­corn lover, a narwhale.

Whale Gang… keep them edges keen, the chips piled high, and remem­ber, puns are fun! ;-).

From “Ol’ Don’s” Drawing Table

OlDonFrom “Ol’ Don” Draw­ing Table

 “Ol’ Don” Burgdorf presents Foot­ball Gnome

To print the pat­tern, click here; the pat­tern will open in a new win­dow, and should print on 8.5 x 11 paper. For Print­ing Hints, click here.

NFLGnome

Ol’ Don” Burgdorf is a carv­er and artist from Hohen­wald, TN. Don’s fea­ture “Doo­dles ‘n Notes for Carvin’ Folks” appears reg­u­lar­ly in Chip Chats, and his pat­terns are now found in each issue of WOM and Carv­ing Mag­a­zine. He has sev­er­al pat­tern port­fo­lios on a vari­ety of sub­jects avail­able for down­load from his web­site. For infor­ma­tion about the port­fo­lios and oth­er cus­tom ser­vices Don pro­vides carvers, click here. Some of Don’s “Chat­ter­ing Chip­pers” pat­terns can also be seen at the Wood­carver’s Porch pat­tern page.

Ol’ Don now has rough­outs avail­able for some of his pat­terns. You are invit­ed to vis­it Ol’ Don’s home page, or email him at ol’­don AT artofdon.com

Copy­right 2011–2013 “Ol’ Don” Burgdorf. This Pat­tern may be copied for indi­vid­ual use; repro­duc­tion for resale is pro­hib­it­ed with­out express writ­ten permission.

From Pete LeClair

Pete LeClair

Pete LeClair’s Projects

Pete LeClair’s project this issue fea­tures Mike 4


Mike04

Pete LeClair is a well-known carv­er and teacher, author of three carv­ing books and a mem­ber of the Car­i­ca­ture Carvers of Amer­i­ca. You may learn more about Pete at his page on the CCA web site. Be sure to tour the rest of the CCA pages when you have a moment. In addi­tion, you may email Pete at pet­ele­clair AT comcast.net. Pho­tos copy­right 2001 — 2013 by Pete LeClair.

This pat­tern may be copied for indi­vid­ual use only; repro­duc­tion for resale is pro­hib­it­ed with­out express writ­ten permission.